Introduction

Avez-vous déjà acheté un coupe-ongles en voyage, et vous l'avez retrouvé en morceaux dans votre sac ? Avant d'en acheter un nouveau, essayez de le réparer avec ce tutoriel. Tant que vous avez les trois pièces, si vous suivez ces étapes vous retrouverez votre coupe-ongles comme neuf.

  1. iU5luoXlUfijPkRV
    iU5luoXlUfijPkRV
    FJKeULrHCDWNWHJc
    5TVLXtWJkS5Lfn5M
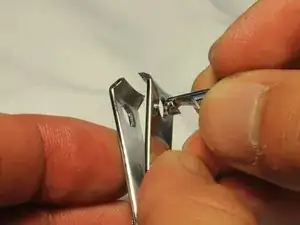
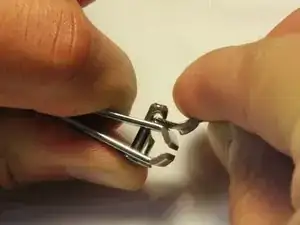
    • Insérez la tige à travers le trou de la partie basse du corps du coupe-ongles, et continuez à travers le trou de la partie supérieure.

    • Insérez en premier le côté avec l'entaille.

    • Note : souvent, on trouve une lime ou un pic attaché sur la partie supérieure du corps du coupe-ongles. S'il n'y a pas de lime ou de pic, alors les deux côtés peuvent être en haut ou en bas.

  2. LAIiNUBseg4PYtxo
    • Compressez le corps du coupe-ongles pour laisser apparaître l'entaille.

    It is really hard for me to do this with one hand. help?

    Ashleberry -

    Me too it’s hard

    Isabel Flores -

  3. iKAMLjMuTDDY6iV6
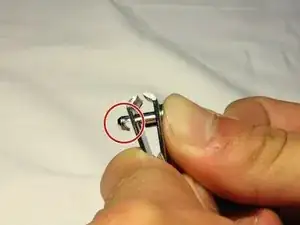
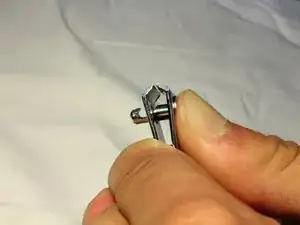
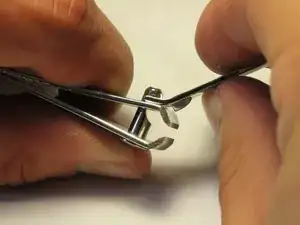
    • Faites tourner la tige jusqu'à ce que l'entaille soit du côté où ça coupe.

    • Cela permettra de faciliter l'étape suivante.

  4. 52qLTECaysXHjAUj
    52qLTECaysXHjAUj
    IbFglh1auHV65CIv
    Y4MV5ENaToDt656K
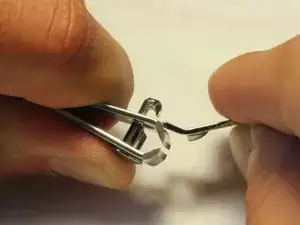
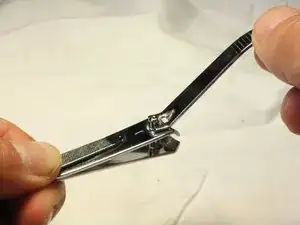
    • Placez le trou du levier dans l'entaille.

    • Relâchez le corps du coupe-ongles pour verrouiller le levier.

    • Note : la position du levier n'a aucune importance à ce stade.

  5. pNOHLfWpA5Q32FOk
    pNOHLfWpA5Q32FOk
    LrVQuonsbCOXdJRO
    QNZlVwH4gBWknyRu
    • Faites pivoter le levier jusqu'à sa position normale, et testez si votre coupe-ongles fonctionne.

    I accidentally broke my grandma’s nail clipper

    but I fixed cuz of dis

    NATALIE GARZA -

    Super vielen Dank es hat funktioniert

    Chris -

    very helpful 10/10 guide, preciate u man

    himothy -

    Tolle Anweisung, Dankeschön! Es klappte!

    Corina Signer-Durisch -

Conclusion

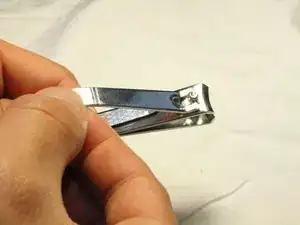
Si vous suivez ces étapes, vous devriez remettre votre coupe-ongles en état de marche.

Robert Weber

Membre depuis le 10/04/15

2149 Réputation

27 commentaires

Thank you so much ! My fingers are arthritic and I was frustrated until I found your instructions.

marvin -

Thank you. Knew it was simple! Love this website.

jonathanl.aguiar -

This is the dumbest “repair guide” I have ever seen. It is not a repair, because they are not broken, it’s a re-assembly.

Albert E -

That's why it says reassembly 🤨

Blake Jordan-Borns -

Thank you so much!!!! I could only find one pair in my house and was feeling desperate. This is the best guide to repair and I’m glad you posted under broken nail clippers because that’s what I considered mine to be and how I looked it up.

Tanya Bishop -

I used you steps, but whenever I try to rotate the handle so that I can clip my nails the handle just pops off again.

Arianna Gessaman -

Albert E, the name of the website is “Nail Clipper Reassembly” you are not prooving a point. Its not dumb either because everyone else’s nail clippers work now. And the deffintion of repair is…

re·pair1

/rəˈper/

verb

1.

fix or mend (a thing suffering from damage or a fault). Or put something back together.

"faulty electrical appliances should be repaired by an electrician"

synonyms:mend, fix (up), put right, set right, restore, restore to working order, make as good as new, patch up, overhaul, service, renovate, recondition, rehabilitate, rebuild, reconstruct, refit, adjust, regulate; More

noun

Arianna Gessaman -

Thank you!! I have been trying for weeks! Your pictures are awesome. I looked at the 1st one and I was good to go!

G Coker -

where would you find a replacement pin? Mine is bent beyond repair. mymothersblessing@yahoo.com.

mymothersblessing -

its good idk what else to say

Jaden Carter -

Perfect instructions!

Janine C Kniola -

Came home drunkk; stepped on my toenaiil clippers; googled how do I fix my toenail clippers; found your tutorial, and I fixed them!!!

I may not remember this tomorrow, but your tutorial was great. Thank you

KIMBER FLETCHER -

Thank you so much, this really helped!

Sophie -

I fixed my clippers with your instructions 😊

Mandie Marie -

Saved me from my hang nail. Thank you.

SMARTIEMARTIE -

Like most things in life, when you get shown the proper way of doing things, it becomes simple. Thanks for the help.

AMS -

Co-sign & I'm a visual-learner 100%

A. R. -

Amazing stuff, thank you!

Marcus Lauritsen -

Thanks! I was trying to figure out how to put them back together for the last 30 minutes, unsuccessfully. Only googling the question and finding your guide helped ❤️

Izzy Dizzy -

thank u! this is a lifesaver.

Lauren Bendik -

So helpful, for some reason it felt liking trying to complete a Rubik’s cube before following this very handy guide!

Toby Syme -

This is too accurate! Lmao!!

A. R. -

thank god i found this, was going to buy a new one

Yuri Lewin -

I've had to reassemble my nail clippers a couple times before, but I can never remember the process. This is simple & efficient, thank you!!!

A. R. -

Thank you, it was easy, and much appreciated!

Harleyakee -

POP QUIZ: In which direction should the lever pull against the center rod when clipping? I have come to find that it ultimately DOES make a difference in the life of your clippers.. if you notice, the rod can be turned in the opposite direction and the force is no longer bending the "neck" or "notch" of the center rod "backward" or "open", but can be made to bend more "closed"... It in turn will extend the overall life of the clippers... (Ancient Chinese secret) ~ John Kipp

John Kipp -

Thanks for this! I'd never had this happen before, and I was glad to find such straightforward instructions to repair my clippers!

Jaimee M Voth -