Introduction

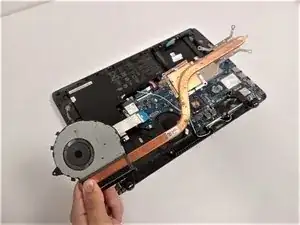
This is a motherboard replacement guide for the Asus Q524U (Q524UQ) laptop. The motherboard is the main circuit board for the computer.

  1. dV3KyXpB3HHIVXEP
    dV3KyXpB3HHIVXEP
    PPsuAGEHoXuayJIH
    • Remove ten 3 mm screws using a Phillips #0 screwdriver.

  2. gKhGdTMCdLtOsMUw
    • Lift up the back panel and set it to the side.

  3. JpMbZUeXG3ThmEMf
    JpMbZUeXG3ThmEMf
    sMMEnJQnZywnWo41
    • Using your fingers, grip onto both sides of the wire harness and push it upwards.

  4. O1ALlNiN4LGtd6TT
    O1ALlNiN4LGtd6TT
    lsaMfONSkQauZT21
    • Remove the five 3 mm screws holding the battery in place using a Phillips #0 screwdriver.

  5. 35ArfHw3euIwLbqV
    35ArfHw3euIwLbqV
    IjXWdmYfWBMEg4gc
    1QMwFodHHn6ugZiU
    • Tilt the small black tab up which will allow the blue tape to be slid out.

  6. IImm1IBDAYmjUhZI
    • Simply lift the battery up and out of its holding area.

  7. frkiqXGMqrMWPD4V
    • Remove the four 3 mm screws holding the fan in place using a Phillips #0 screwdriver.

  8. IXIjkFO4L6TyZCSg
    IXIjkFO4L6TyZCSg
    GdAOJhLsEXMsTehR
    • Remove five 3 mm screws holding the heat sink in place using a Phillips #0 screwdriver.

  9. UYppKIyWsNlHFD2w
    UYppKIyWsNlHFD2w
    VUPGGPtvXPJnJITM
    nQvTkwUwQsMLZqPN
    • Pull up fan connector tab by using the plastic handle.

  10. Yg1JtiMlojgk2Rhg
    Yg1JtiMlojgk2Rhg
    tkHAumvK1JYTUBus
    • Unwind the cable wrapped around the fan casing.

  11. TZVQybrWNSJOkMPn
    • Disconnect the small cable from the fan.

  12. X3eGPqqCC62GIYTC
    • After all screws and cables are unsecured, lift the fan assembly out of the laptop.

  13. GwtKTbUVuJD6edgV
    GwtKTbUVuJD6edgV
    cOylbtjHAC6FTCAN
    • Disconnect the black and white wires by pulling them up.

  14. 4P1iYeQFOPsxYs4N
    4P1iYeQFOPsxYs4N
    PyFgHDNZESyXxftt
    • Unscrew the single 3 mm screw using a Phillips #0 screwdriver.

  15. OwLjUwoIOg4VmCyW
    OwLjUwoIOg4VmCyW
    EtLhgN2oHykLXoAd
    • Slide the Wi-Fi card out of its slot.

  16. 6BKJGyMEYA1ZwhLy
    6BKJGyMEYA1ZwhLy
    BwoF6XmXWBmQKc3a
    • Remove the seven screws attached to the motherboard using a Phillips #0 screwdriver.

  17. R2frRMXwMmYEUAHm
    R2frRMXwMmYEUAHm
    63BJFArVg6T1MTKE
    WsJxJXRKsWyM4hLP
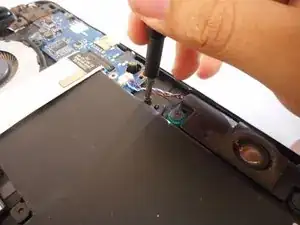
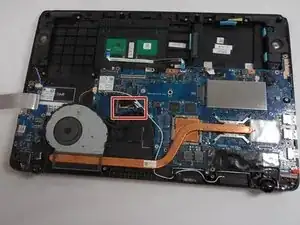
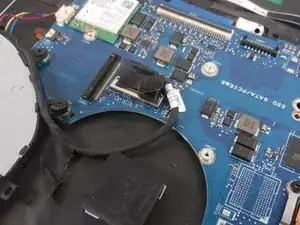
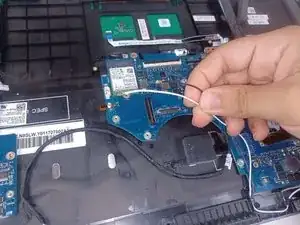
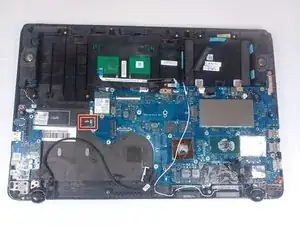
    • Using your finger flip the tab holding this light blue ribbon cable and move it out of the way.

  18. CcOwBktYXaD3AUry
    CcOwBktYXaD3AUry
    OkSIHVSWnI1alAgu
    • Using your fingers lift this tab up and pull out the blue ribbon cable.

  19. DmhXdDGiFMst4ClV
    DmhXdDGiFMst4ClV
    ELHgrQTvPAIUvpD2
    GrIqdD5QQ2QI1hDO
    • Flip up the orange tab beneath the Wi-Fi card and pull out the wire.

  20. MjxAisycpmGLRPq4
    MjxAisycpmGLRPq4
    ZtFtZYgDWJI5xXNR
    QrGc4FVr1PcWdAeO
    • Using your fingers, disconnect this wire harness by pushing it out from both sides.

  21. QOqrMUnkNAIJTOS2
    QOqrMUnkNAIJTOS2
    mv6QjqTXikTRYPo5
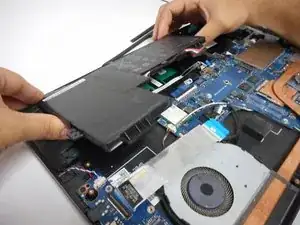
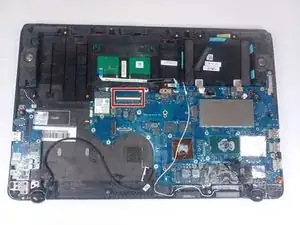
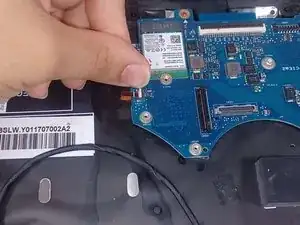
    • With your fingers, pull this tab up to disconnect the wire from the motherboard.

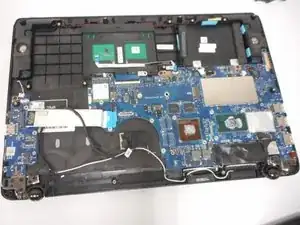
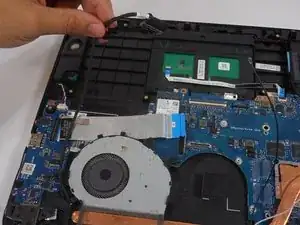
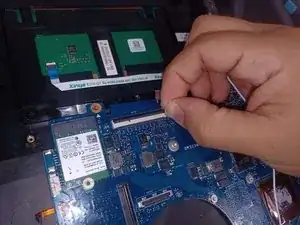
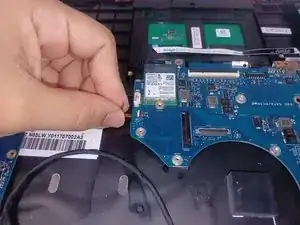
    • With this tab out of the way you can now pull the motherboard out.

Conclusion

To reassemble your device, follow these instructions in reverse order.

Kevin Nguyen

Membre depuis le 08/03/23

151 Réputation

0 commentaires