Introduction
Outils
Pièces
-
-
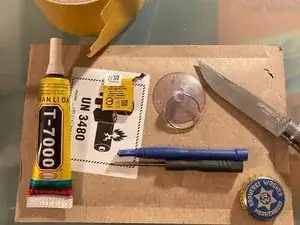
Pour le remplacement j'ai utilisé :
-
batterie neuve, eau bouillante, couteau, ventouse, cale en plastique, tournevis, ruban adhésif double face, colle t-7000
-
1. retirer le bracelet
-
2. faire bouillir 1L d'eau
-
-
-
Si vous utilisez de l'eau, laissez reposer l'eau bouillante pendant 60 secondes puis versez l'eau sur l'écran.
-
Assurez-vous de sécher la montre avant de retirer l'écran !
-
Pour retirer l'écran, un couteau a été utilisé pour séparer l'écran, ainsi qu'une ventouse.
-
-
-
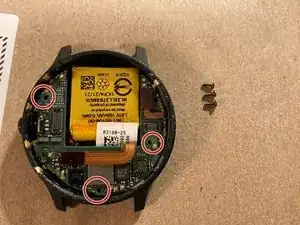
Retirez l'ancienne batterie
-
Ensuite, collez du ruban adhésif double face sur la nouvelle pile. Veillez à connecter et à placer la nouvelle pile à l'intérieur de la montre.
-


Effectuez les étapes dans l'ordre inverse pour remonter votre appareil.

5 commentaires
do you have the same instructions for a garmin vivoactive music 3?
Very clear and excellent presentation. Clarity of images. Succinct and effective descriptions of steps and tips. Very helpful colored circle markings.
Questions :
1. Tool used to separate FPC's ?
2. Tool used to reattach FPC's ?
3. Some people have spoken of battery wires disconnecting from plastic connector fitting during separation/removal. What did you use to disconnect the battery connector fitting ?
4. Type of double sided tape used ?
5. Where double sided tape applied ? (There is original tape on original battery to demonstrate ?)
6. Did you apply new glue to only the underside rim of the watch face ?
7. How were you careful to avoid excess glue contacting circuit board upon re-attachment of watch face ?
8. Und jetzt habe ich Durst auf ein würziges Brauerei Wagner Kupferstich Rotbier! : )
Dave -
Perfekte Anleitung!
Der Trick mit dem Wasser ist Gold wert, wenn man seine Elektronik nicht mit dem Fön „grillen“ möchte. Uhr läuft wieder wie in den ersten Tagen. Danke dafür!
Vielleicht sollte man noch erwähnen, dass der Batterieconnector einfach nach oben abgezogen und genau so wieder draufgesteckt werden kann.
MichaelS -