Introduction
Ce tutoriel de réparation a été rédigé par l'équipe d'iFixit et n'a pas été approuvé par Google. Plus d'infos sur nos tutoriels de réparation ici.
Suivez ce tutoriel pour changer l'écran cassé ou fissuré d'un Google Pixel 5a.
Pour votre sécurité, laissez la batterie se vider en dessous de 25 % avant de vous lancer. Cela réduit les risques de déclencher un incendie dangereux si jamais vous abîmez accidentellement la batterie pendant la réparation. Si votre batterie est gonflée, prenez les précautions nécessaires.
-
-
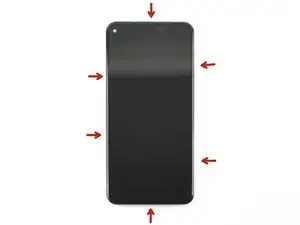
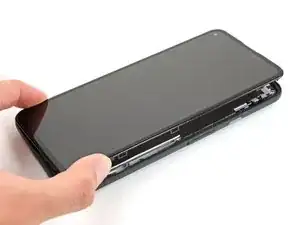
Notez les deux jointures sur le bord du téléphone :
-
Jointure de l'écran : cette jointure sépare l'écran du reste du téléphone. Ne faites surtout pas levier ici.
-
Jointure de la bordure : c'est là que la bordure en plastique conçue pour protéger l'écran est fixée au châssis. Elle est maintenue en place par des clips en plastique. C'est là que vous devez faire levier.
-
-
-
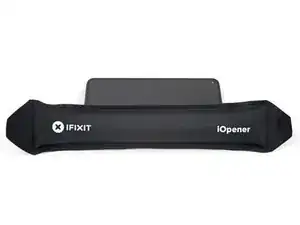
Posez un iOpener chauffé sur le bord droit de l'écran pendant une minute pour ramollir l'adhésif.
-
-
-
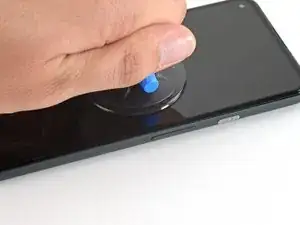
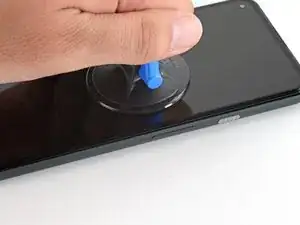
Positionnez une ventouse aussi près du bord droit de l'écran que possible.
-
Soulevez la ventouse de façon ferme et constante afin de créer un petit interstice entre la bordure et le châssis central.
-
-
-
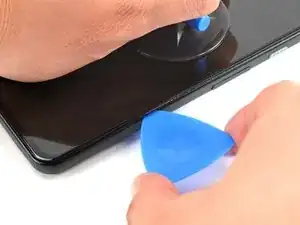
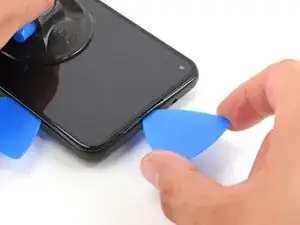
Insérez la pointe d'un médiator dans la jointure de la bordure à environ 4-5 cm du bas du téléphone.
-
-
-
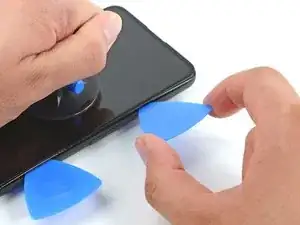
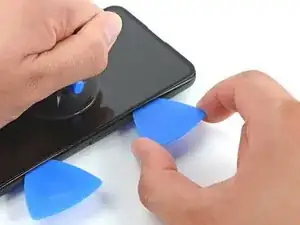
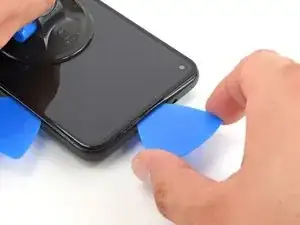
Insérez la pointe d'un médiator dans la jointure de la bordure à environ 3-4 cm du haut du téléphone.
-
-
-
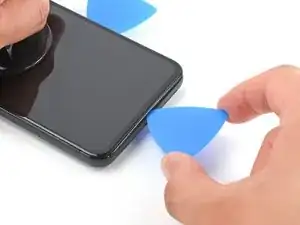
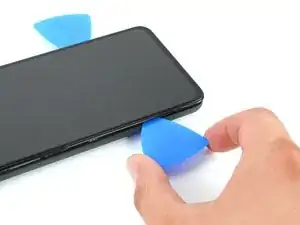
Insérez la pointe d'un médiator dans la jointure de la bordure du côté gauche du téléphone à environ 2 cm du bas du téléphone.
-
-
-
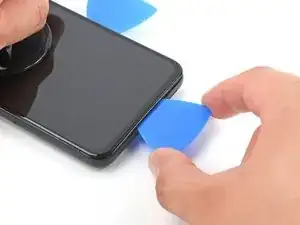
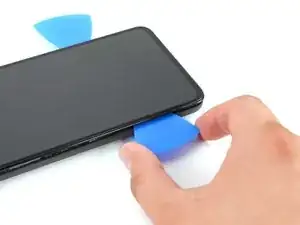
Insérez la pointe d'un médiator dans la jointure de la bordure à environ 3-4 cm en dessous de la caméra frontale.
-
-
-
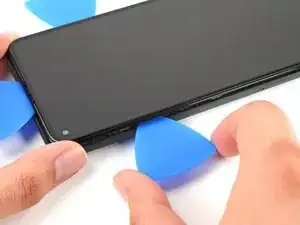
Veillez à défaire tous les clips. Découpez tout adhésif restant à l'aide d'un médiator.
-
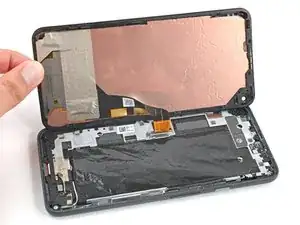
Ouvrez le bord droit de l'appareil comme un livre.
-
-
-
Utilisez un tournevis Torx T3 pour retirer la vis de 4,6 mm de long qui maintient le cache du connecteur d'écran.
-
Tout au long de la réparation, gardez la trace de chaque vis et assurez-vous qu'elle retourne exactement là d'où elle vient.
-
-
-
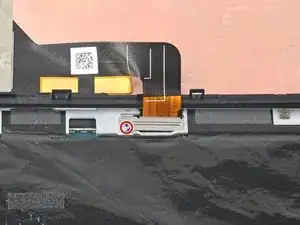
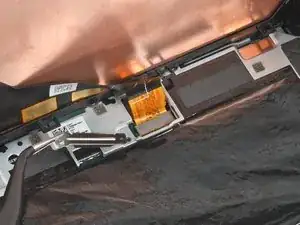
Utilisez la pointe d'une spatule (spudger) pour faire levier et déconnecter la nappe d'écran.
-
-
-
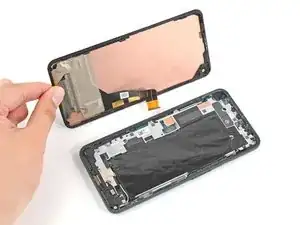
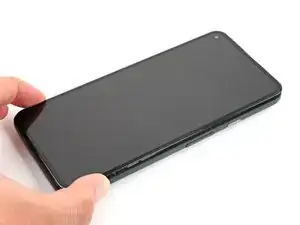
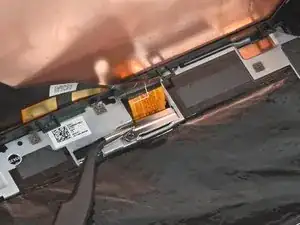
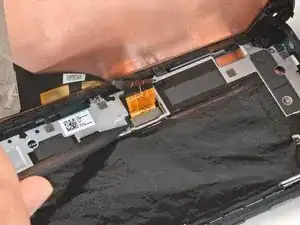
Retirez l'écran du téléphone.
-
Si vous avez remplacé l'écran, vérifiez que l'écran soit bien aligné avec le trou de la caméra frontale et enlevez la protection en plastique qui le recouvre.
-
Si vous utilisez de l'adhésif découpé sur mesure, suivez ce tutoriel pour appliquer correctement le nouvel adhésif écran.
-
Si vous utilisez du ruban adhésif Tesa pour recoller l'écran, suivez ce tutoriel.
-
Au cours du processus de démarrage après le remontage, l'écran passe par une séquence de calibrage. Ne touchez pas l'écran pendant ce processus, car cela pourrait entraîner un mauvais calibrage tactile et créer des problèmes de tactile.
-


Pour réassembler votre appareil, suivez les étapes ci-dessus dans l'ordre inverse.
Déposez vos déchets électroniques dans un centre de recyclage certifié.
La réparation ne s'est pas déroulée comme prévu ? Essayez des solutions de dépannage de baseou demandez de l'aide sur notre Forum.
Comparez votre nouvelle pièce de rechange à la pièce d'origine - il se peut que vous deviez transférer les composants restants ou retirer les dos adhésifs de la nouvelle pièce avant de l'installer.

41 commentaires
Thank you, this was useful for removing the screen from my device without damaging it further! With the invisible fasteners, a guide like this is invaluable for knowing where the latches are and how to get to them.
As a guide for replacing a screen, there are a few other things worth mentioning:
• Is it necessary to remove the old gasket ("adhesive film")?
• How do you apply the new display adhesive, the one that comes on a blue card? Do you need to do that before re-attaching the new screen cable? Why are there cut-outs in the blue card that mostly match the positions of contacts on my device, but not entirely? Do I remove it before closing the device?
• In addition to a couple pieces of tape, the replacement screen also comes with a small piece of film protecting the camera area. Do pull it out by the small red tab before re-assembly.
• Any other tips for reattaching that press-fit board-to-board connector? Should I really expect it to click into place? It took me many tries to get that aligned and secured!
keturn -
1. Depends on what you mean by "Necessary," but it is recommended
2. In Step 15, there is a guide linked for custom-cut adhesive; follow that one.
Yes, before you reconnect cable.
I don't know what the cutouts are for, but you will remove the blue card anyway after applying the adhesive to the frame. The important part to line up is the adhesive to the frame; the blue card doesn't matter beyond that.
And yes, you will remove it before closing the device.
3. Didn't see that. I hope my device's camera works. I'll check that now.
4. Reconnecting this was the most tedious part for me. I used the gold colored corners on the board to line up the connector(you can see these in the picture for step 15. Also, I used my finger and not the spudger for pressing down when reattaching (and I don't have small hands); this helps you feel the slight click when it's in place.
Also, you can use the suction cup as a sort of kickstand so you have enough ribbon cable to work with (because there's not a lot of it.)
Lol No -
Literally went step by step by this guide and repaired my own Google pixel 5A phone. If you purchase the entire repair kit for the Google Pixel 5A you have essential every tool you'll need. I will recommend ordering screens for this phone here from this website.
Muy buen tutorial, hay que mejorar la parte donde se coloca el adhesivo ya que no lo explica pero el resto esta muy bien. demore 30 minutos en remplazar la pantalla.
Lucho -
This will be clear if you examine your replacement part first.
bcling -
True, but one may be disassembling the device prior to receiving their replacement 😉
Niels Klassen -
I'm not sure why it's recommended to pry at the bezel seam. I followed this guide but the bezel that's held in by clips, provides some additional housing for the front facing camera as well as the ear-speaker grille. I ended up separating the old screen from the bezel and putting the bezel back into the phone first, before installing the replacement screen.
Kevin Kim -
My replacement screen did not come with the bezel, and I had to remove it from the old screen. I didn't notice this until i attempted to replace the screen. Be sure to look at your replacement screen prior to reassembly. It will save you some heartache. All was good though and the phone is working.
jak ll -
1. "Be sure to turn off your device before you begin the repair". Kind of tough to do if you are replacing the screen because it is blank and you can't tell what is going on or select a "Power Off" option.
2. To power off the phone, would be good to have instructions to disconnect the battery once the screen is disconnected from the rest of the phone.
BlueNGray -