Introduction

Ce tutoriel vous montre comment installer un disque dur de 2,5" dans le boîtier externe vendu par iFixit. Le boîtier peut accueillir un SSD ou un disque dur standard à plateaux de 2,5 pouces, à condition qu'il soit équipé des connecteurs SATA appropriés.

Si vous avez un boîtier en silicone, consultez plutôt ce tutoriel.

  1. 4JhGoJe32DvBABcV
    • Avant de commencer, examinez les ports de votre disque dur et vérifiez qu'il a les bons connecteurs :

    • Port étroit pour les données

    • Port large pour l'alimentation

  2. l5LZ15iFvLKSgKkj
    • Servez-vous du tournevis inclus avec le boîtier pour dévisser les deux vis cruciformes.

  3. GlKNvlSsO66fTYOs
    GlKNvlSsO66fTYOs
    uFfdj1OJMECyOWK1
    • Sortez le tiroir en plastique du boîtier en aluminium.

    it doesn't slide out

    jbechtel1 -

  4. HEDUVFyoyHCPjZQG
    HEDUVFyoyHCPjZQG
    yG2mwjvGE4BUJmEU
    bHqdPvQVNkFSCtrl
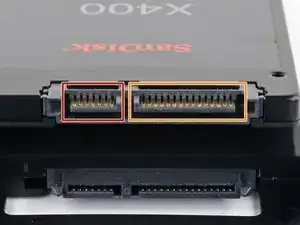
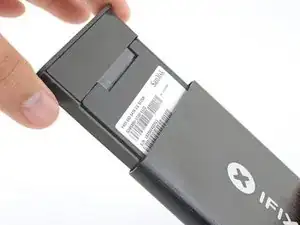
    • Mettez le boîtier dans le tiroir en plastique et alignez les ports du disque avec la prise du tiroir.

    • Pour éviter de trop solliciter la prise du boîtier, introduisez le disque aussi horizontalement que possible dans le tiroir.

    • Poussez soigneusement le disque dans la prise pour brancher les ports.

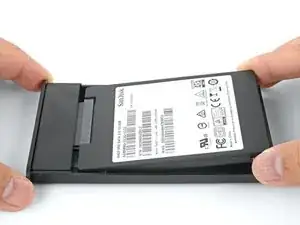
    • Enfoncez le côté surélevé du disque dans le tiroir en plastique.

    • Si le bord du disque reste accroché au bloc en mousse, le disque dur n'est pas bien mis dans la prise. Continuez à enfoncer le disque dans la prise jusqu'à ce qu'il s'écarte du bloc en mousse.

    It is helpful to use something thin like a credit card as a shoe horn here - while the back edge is still raised, insert a thin card between the edge of the drive and the foam block, then push the drive edge down and slip the card out. This will allow the end of the drive to sit flush against the block without any overlap or mashing of the block. It also eliminates the need to keep pressing or forcing the edge of the drive to fit.

    Charles Bradford -

    What is the little round black stick on pad in the kit for?

    believeinlove -

  5. tZZJY1ygca2RoloP
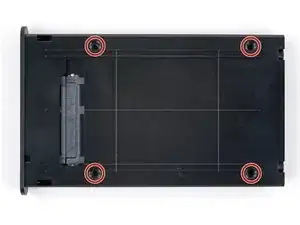
    • Retournez le tiroir du disque dur.

    • Avec un tournevis cruciforme, vissez les quatre vis de montage (inclues dans le kit) pour fixer le disque au tiroir.

  6. oUPQLXfcPRKeDdLN
    oUPQLXfcPRKeDdLN
    ajPNox2oOMWeTPlM
    v5h44HwBXbMnMlGu
    • Glissez le tiroir dans le boîtier en aluminium.

    • Revissez les deux vis cruciformes pour fixer le tiroir.

Conclusion

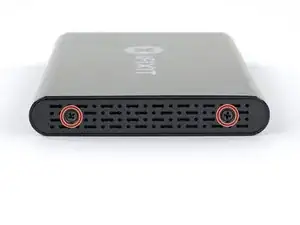
Votre boîtier est prêt à l'usage !

Arthur Shi

Membre depuis le 03/01/18

271465 Réputation

9 commentaires

Now what do I do?

Louise McCampbell -

You will need to plug the enclosure into a computer to access it. From there, you can format the drive or retrieve data.

Arthur Shi -

How do I plug the enclosure into a computer? Are there cables? Thank you.

Shannon Mikus -

Very good explanation on "How to do it yourself"

Jawa Herath -

Very good Instructions with clear explanations.

Jawa Herath -

I have removed the two screws to open the case and install the SSD, but it won't slide out. 😡

Keith Ball -

Works like a charm! The kit included a soft rubber bumper pad, the size and shape of a quarter (US$0.25). No explanation of where it might go -- but I assume it'd be handy if the drive itself was somewhat thin and needed some support within the enclosure.

Joel Baird -

I'm wondering what that little dot is for as well?

believeinlove -

The drive is successfully installed in the case and connected to my second Mac to grab some old files but I"don't have permission" to open my old documents etc folders. Will the permissions be repaired if I plug it into the Mac it came from? Or how do I make the drive available on other Macs?

Matthew Matthew -