Introduction

Ce tutoriel de réparation provient de l'équipe iFixit et n'a pas été soumis à l'approbation de Google. Pour en savoir plus sur nos tutoriels de réparation, c'est par ici.

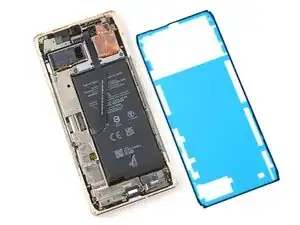
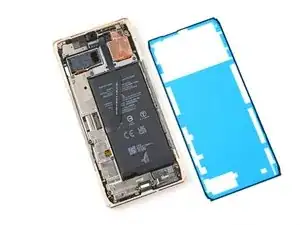
Utilisez ce tutoriel pour appliquer un nouveau film adhésif dans votre Google Pixel 6 Pro après une réparation. L'écran de votre Pixel doit être retiré avant de suivre cette procédure. Suivez ce tutoriel pour retirer l'écran si vous ne l'avez pas déjà fait.

  1. vOxGqvEMRQ4VxmVE
    vOxGqvEMRQ4VxmVE
    H3VXXfHJQ2j5VmXO
    Sh1fh1DuW3EPBsRV
    • Tout adhésif résiduel ou débris empêchera votre écran de se sceller correctement.

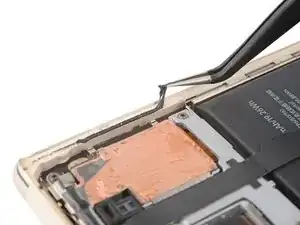
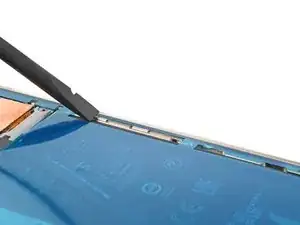
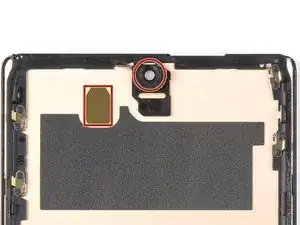
    • Utilisez l’extrémité plate de votre spatule pour enlever le plus d’adhésif possible.

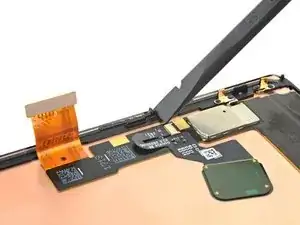
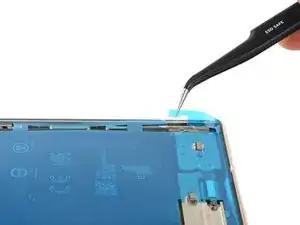
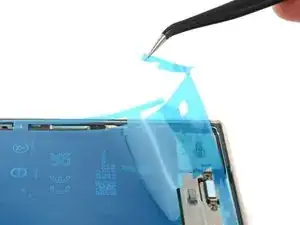
    • Utilisez une pincette ou vos doigts pour décoller et retirer tout adhésif restant.

    • Veillez à ne pas perforer la batterie avec votre pincette – une batterie perforée peut laisser échapper des produits chimiques dangereux ou provoquer un incendie.

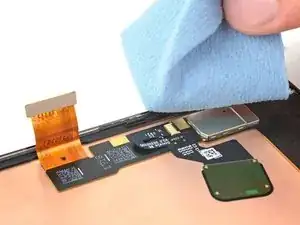
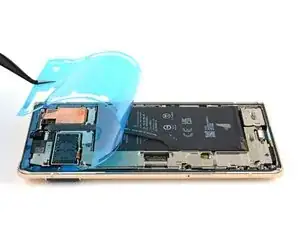
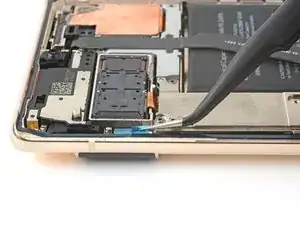
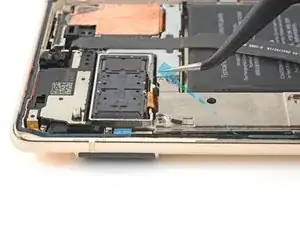
    • Nettoyez le périmètre du châssis avec une petite quantité d’alcool isopropylique hautement concentré (plus de 90 %) et un chiffon non pelucheux ou en microfibre.

  2. 1KPZMaVpogCR1isd
    1KPZMaVpogCR1isd
    UBdKYT1BBpsgTPn6
    cSyW3ftigSvRr2KG
    • Si vous réutilisez votre écran, nettoyez-le comme vous l’avez fait pour le châssis.

  3. BfekWMJqs6b31KjV
    BfekWMJqs6b31KjV
    VPVwycMBJRvgIyGr
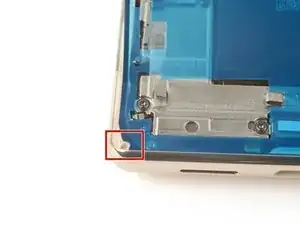
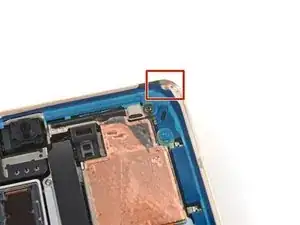
    • Avant d’appliquer le nouvel film adhésif, posez-le sur le châssis pour trouver sa bonne orientation.

    • Utilisez des repères telles que la caméra frontale, le haut-parleur supérieur et les encoches d’angle pour orienter l’adhésif.

  4. MiXBkRA63MxLtbrg
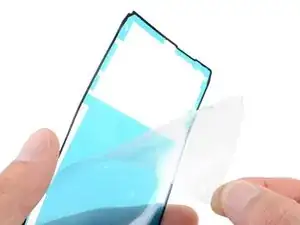
    • Utilisez la languette en haut du film adhésif pour retirer le support de protection transparent.

  5. FZBNDkfJZnWWWuKg
    FZBNDkfJZnWWWuKg
    DTWrEko3ZqQPqukg
    asaRWLlQNnMWUjIB
    • Soyez très prudent pendant cette étape! L’adhésif est très collant et ne peut pas être repositionné une fois qu’il a été collé. Un adhésif mal aligné peut entraîner une mauvaise étanchéité.

    • Posez l’adhésif sur le châssis, en commençant par le bord inférieur. Faites de petites corrections au fur et à mesure.

    • Utilisez l’encoche inférieure gauche, l’encoche supérieure droite et la découpe du haut-parleur supérieur pour vous aider à aligner l’adhésif.

  6. VcKEaNSNUFlOLMaQ
    VcKEaNSNUFlOLMaQ
    MuY4AJ4mlpRdfWIK
    6TBaHUgYWZAmPavV
    • Utilisez une spatule ou vos doigts pour appuyer fermement le long du périmètre de l’adhésif et l'adhérer au châssis.

  7. KPSErArInFUVsU2O
    KPSErArInFUVsU2O
    HFBPlWwU2THM2ipC
    l6g2DxmfXIA2EBfD
    • Saisissez la languette située en bas à droite du cadre et retirez le film de protection principal.

    • Il y a un plus petit film de protection sous celui-ci. Ne le retirez pas pour le moment.

  8. MfmGyTSAcajP6siM
    • Vérifiez que les découpes pour le capteur et l'objectif de la caméra avant sont dégagés sur l'écran de remplacement et enlevez toute protection plastique restante.

    why dont you show the method to connect the cable? This is the most important part. I cant seem to be able to connect. I dont hear or feel a click

    Rome Gabe -

    I missed this step and don't have a front facing camera now. Whoops!

    Kyle -

    VERY IMPORTANT: Remove the protective film on the camera hole. I breezed through this step too fast, thinking it was referring to the blue film that was elsewhere on the protective screen. Now my selfie cam is blacked out for the time being.

    eliasp02 -

  9. 4E66NsxrJkTHoLAX
    • Revenez au tutoriel de votre téléphone et continuez le remontage.

    • N'oubliez pas de réinstaller le support de la nappe d'écran.

    • Terminez ce tutoriel lorsque votre écran est installé et que vous êtes prêt à fermer le téléphone.

  10. q6VeQFQYXhMQ1NZu
    q6VeQFQYXhMQ1NZu
    NItaUExClEPpbfP6
    foKIGvLolJlxnvHQ
    • Saisissez la languette située en haut à gauche du châssis et retirez le film protecteur couvrant l'adhésif du périmètre.

    • Assurez-vous que l'adhésif ne se décolle pas avec le film protecteur.

    Where does it mention to remove the sticker from the front camera? Also, a photo of this with highlight around the area would be super helpful...

    alberte -

    Hi! In this process, there isn't a liner over the front-facing camera or its recess in the screen. This process only demonstrates how to apply the adhesive which secures the border of the screen to the frame. If you are following this guide, using this part, then bullet 6 of step 11 provides a reminder to check the recess in your replacement screen. It appears that our part doesn't come with the front camera liner, which may be why the original author didn't include a picture of the liner. Your part may differ slightly.

    Clay Eickemeyer -

  11. 14UobuNNkVdYqCZ6
    14UobuNNkVdYqCZ6
    4jHVlV1XCxsxUFba
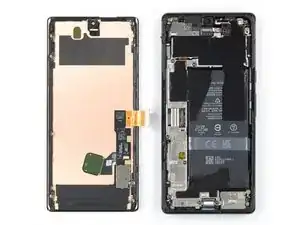
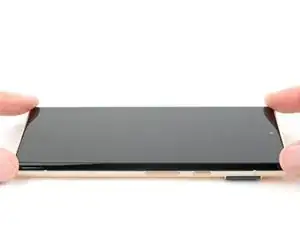
    • Retournez l’écran et posez-le sur le châssis.

    • Appuyez le long du périmètre de l'écran pour le fixer.

    What do you think about using t8000 or b7000 glue? I am concerned that the water resistance will not be very good with this OEM glue. I have it and it doesn't look very thick. You know how the screen sort of snaps into place without adhesive? Well mine does not snap in one corner and lifts up about a 32nd of an inch. I worry the adhesive sticker will not work on this spot.

    Michael Carton -

    It sounds like either one of the clips isn't engaging near the corner you mentioned, or the frame is slightly bent. After you replace the adhesive and reinstall the screen, compress the phone with a lot of force for an extended period of time. As I mentioned in my other comment, official screen installations require something in the ballpark of 80 psi for 30 seconds to properly seat the adhesive. For best results, find a way to evenly compress your phone with a strong force. Be careful not to distribute an uneven amount of force to the raised rear camera mesa. Doing this will better allow the glue or adhesive to settle. In the end, don't trust the water resistance to be as good as original.

    Clay Eickemeyer -

    why is there no advice on connecting the cable? I wish I checked instructions before purchasing, I didn't realise how little detail they give you.

    Lee Luderman -

    Tips on pressing it all back together? I've followed everything here, but am having trouble closing it up by "pressing gently." Even firm pressing is not connecting the clips.

    Andi -

  12. PXPk1i62abp2a6vB
    PXPk1i62abp2a6vB
    OClGoqfkGI1Kq4iJ
    Qt1CPpJDaVSRibvQ
    • Pour comprimer uniformément votre Pixel et renforcer la liaison entre écran et châssis, vous devez tenir compte de la barre de la caméra.

    • Si vous avez des étaux de serrage pour écran, vous pouvez contourner la barre de la caméra. Fixez les étaux de serrage au périmètre de l'appareil.

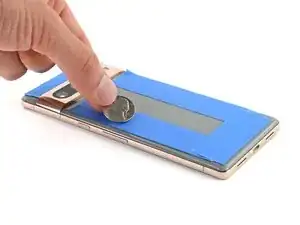
    • Posez une bande adhésive sur le périmètre de votre vitre arrière pour protéger sa finition.

    • Placez des pièces de monnaie ou des objets de même épaisseur le long des bords de la vitre arrière. Assurez-vous qu'ils soient aussi épais ou plus épais que la barre de la caméra.

    • Empilez plusieurs livres ou autres objets lourds sur votre téléphone. Laissez-les en place pendant trente minutes ou plus. Idéalement, laissez-les empilés pendant toute une nuit.

    How long should the phone be clamped down until the adhesive is considered properly cured?

    eliasp02 -

Clay Eickemeyer

Membre depuis le 19/09/22

76560 Réputation

8 commentaires

will the phone have the same water resistance rating after this? Assume proper adhesive placement? ALso, what about b7000 glue? Any comment on using that?

Michael Carton -

Your phone will lose its official IP rating after reapplying any adhesive. The official double sided adhesive technically requires a large amount of force (somewhere in the ballpark of 80 psi) to bond as well as the phone was originally sold with. Without the equipment to do this, its difficult to predict how well your individual repair will hold up against water. A mobile-device-specific glue will work in the same fashion. I encourage you to seal the phone however you feel most comfortable. If you try glue instead of the official adhesive, make sure to be extremely precise about how much and where you apply the glue, since it's messy and your only barrier against the elements. Good luck!

Clay Eickemeyer -

Thanks!!! I can use a book with a weight on it, of an amount calculated to exert 80psi on the screen. By eyeballing it at a coffee shop, looks like 20lbs. Do you think that I should calculate this ONLY around the perimeter, or do you apply pressure evenly on the whole screen?

Michael Carton -

As a disclaimer: be extra sure the raised rear camera mesa doesn't create uneven force. If it does, the pressure may crack the rear case or lead to an improper seal of the screen. But, yes, calculate the area around the perimeter, since the screen isn't designed to support that weight in only the center.

Clay Eickemeyer -

Hello! I am going to be following this guide soon and I noticed that the alcohol recommended is Isopropyl at 90%. I only have Ethyl at 80%. Is this bad? Is the difference so big that I shouldn't use it? I really need to fix this phone soon and I'm scared of damaging it.

Fox Man -

Hi Fox Man,

Sorry for the late response. If you haven't already done the repair, then this info might be helpful. We recommend 91% isopropyl alcohol for any places that might contact electrical components. 91% or greater evaporates quickly and thoroughly enough so that there isn't any residue left to bridge a connection on circuitry. If you need to use a lower concentration IPA, then be more careful not to let it spill onto any electrical components, and give it more time to dry before connecting the battery.

Clay Eickemeyer -

Can't use fingerprint sensor. Tells me to go to g.co/pixel/fingerprintunlock. Try to do it, immediately get "fingerprint setup timed out"

Michael “Kazimierz” Rojek -

It's hard to say for certain what the issue is. There is discussion on various forums and posts, such as this one, that might be of help.

Clay Eickemeyer -