
Introduction
If you need to replace the silicon buttons in a Garmin STRIKER 4, access them with this guide. Some reasons you may be replacing the buttons include the button pegs being worn down.
-
-
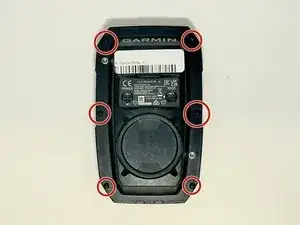
Remove all six 6 mm screws using a Phillips #0 screwdriver.
-
Detach and flip the backside to open the device.
-
-
-
Slide out the screen cable from the motherboard using the iFixit opening tool or your fingernail.
-
Remove the motherboard from the device.
-


Conclusion
To reassemble your device, follow these instructions in reverse order.
