Introduction
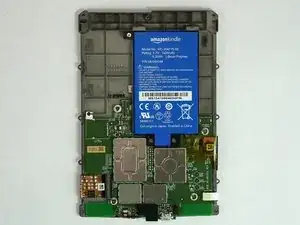
Le Kindle Paperwhite 3e génération (7e génération de Kindles) d'Amazon possède une batterie au lithium-polymère de 3,7 volts (numéro de modèle : MC-354775-05). Ce guide requiert que la Kindle soit éteinte et qu'un outil d'ouverture en plastique et un tournevis PH000 soient utilisés.
-
-
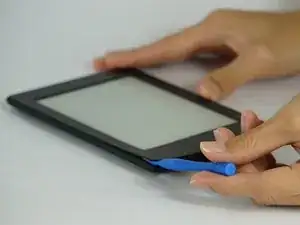
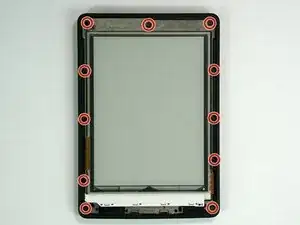
Retirer délicatement le cadre de l'écran à l'aide d'un outil d'ouverture en plastique. Commencez par les coins et passez autour des bords jusqu'à ce que vous reveniez à votre point de départ.
-
-
-
Faites preuve d'une extrême prudence lorsque vous soulevez le cadre. Veillez à ce que votre outil ne tombe pas sous l'écran. Regardez sous le calque pendant que vous travaillez, en séparant l'écran de l'adhésif du cadre.
-
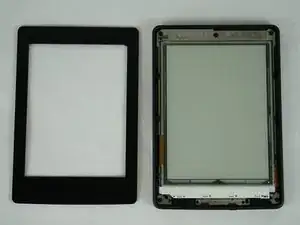
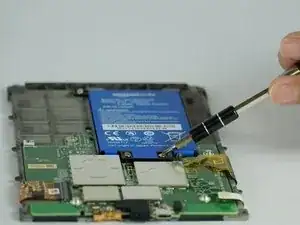
Vous devez vous assurer que votre séparateur passe à travers les deux côtés du cadre, au-dessus de l'écran.
-
La deuxième photo est le calque que vous voulez que votre outil traverse en toute sécurité.
-
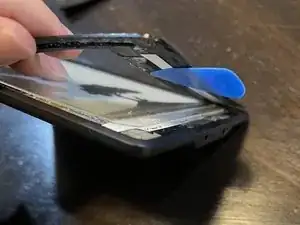
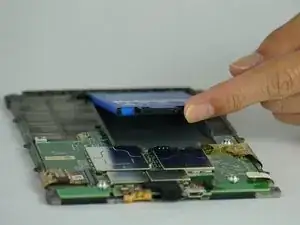
La troisième photo est un exemple de ce qui peut se passer. Dans ce cas, la couche de digitalisation ne lira pas correctement les touches et l'écran sera endommagé de manière permanente.
-


Pour remonter votre appareil, suivez ces instructions dans le sens inverse.

20 commentaires
Same for 5th Generation ??
where can i buy a new battery ?
you need a taobao.
lol
kassadin -
They are sold on aliexpress and ebay but the price of battery and postage is not that different from the price of a second hand 3ed Gen Kindle. But then the second hand Kindle will probably need a new battery too so, I am going to get a battery from ebay.
eBay has that http://www.ebay.com/itm/201606870149
Be very careful along the lower left side, where the cable to the touchscreen can be easily cut with a plastic spudger.
John Kenny -
Be careful at the top of the 3G version. The wifi and cell antennas are located along here.
James Sullivan -
I can’t get my spudger in to start lifting. Any advice?
Davey -
it takes a bit of force to first insert the spudger into the crack
jookieapc -
Be careful inserting the spudger too quickly. The glue holding the screen pulled loose in two spots along the side before the bezel did and there are lines along the border of my screen now.
Nick -
I made my own version of Nick’s error: I inserted a pick too far under the bezel, and very slightly separated the screen, leaving a small shadow in a corner. Easy does it!
Other than that, battery replacement was super-easy and successful.
Brad Compton -
I couldn't get a purchase from the outside, so started from the inside of the bezel. It was secured with double sided tape. Might have been better to apply some heat before prying.
David Glover -
Used the guide to replace the battery. Could not get enough separation using the blue spudger. Used the metal spidger to get things started then switched to the blue picks. Afterthought, Warming the bezel would have helped.
Jeffry Long -