Introduction

Ce guide vous expliquera comment remplacer l'ensemble flash de l'appareil photo a6000 s'il se casse ou est endommagé.

  1. sDrFtEXjVTiThUol
    sDrFtEXjVTiThUol
    O3eFAyYswiRac2EP
    • Commencez par placer la caméra à l'envers.

  2. 12qF3s2kma3frAZo
    12qF3s2kma3frAZo
    kIKTfUC5mEpVDmTL
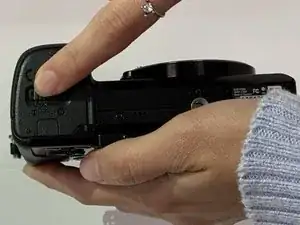
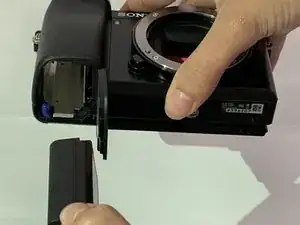
    • Faites glisser la barre de verrouillage crantée sur le compartiment de la batterie de LOCK à OPEN.

  3. 612NDeLGuCYQYLkE
    612NDeLGuCYQYLkE
    RGPxwIMCZuHsFbMk
    • Poussez la petite barre bleue horizontalement hors de la batterie.

  4. osjcsC4YPWFvH4Fx
    osjcsC4YPWFvH4Fx
    IGKDdY1VA21ifCxZ
    • Extraire la batterie.

  5. 4Vl3FyrL54FgFswW
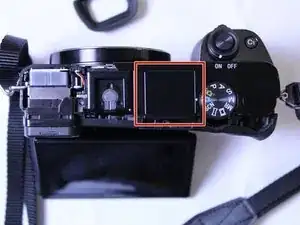
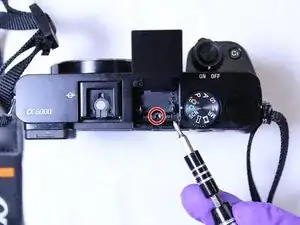
    • Positionnez l'appareil photo avec l'ensemble flash orienté vers le haut.

    • Localisez l'ensemble flash.

  6. on6eAyFJDFsDPS3Y
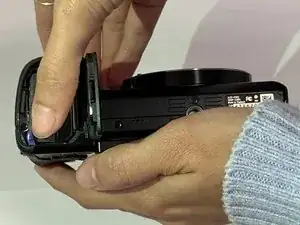
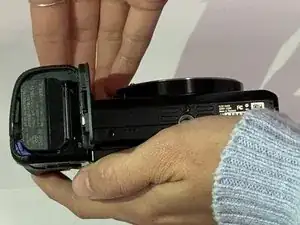
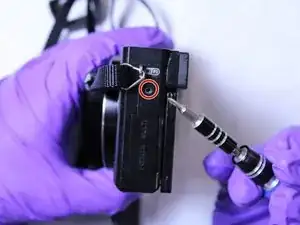
    • Ouvrez l'assemblage flash.

    • À l'aide du tournevis Phillips n ° 00, retirez la vis unique sous l'assemblage du flash.

    There are two screws to remove here.

    iluvgir91 -

  7. CBH4YeVybMlhNTHF
    • Retirez la protection oculaire.

  8. qiCTMiNxaqGHBGPs
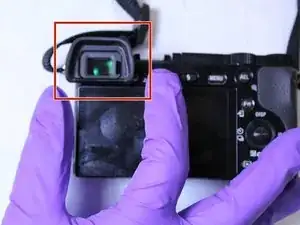
    • Positionnez l'appareil photo avec l'écran LCD orienté vers le haut.

    • Retirez l'écran LCD.

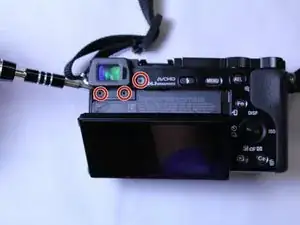
    • À l'aide du tournevis Phillips n ° 00, retirez les trois vis sous le viseur.

    To remove the top panel it is not necessary to remove the screw right of the eye guard.

    Jürgen Walther -

  9. RM3OIH2uKCLkq21P
    • Positionnez la caméra avec le port HDMI vers le haut.

    • À l'aide du tournevis Phillips n ° 00, dévissez la vis unique sur le côté gauche du boîtier de la caméra.

    To remove the top panel, another 2 screws under the battery (battery panel) must be removed, too.

    Jürgen Walther -

  10. YQ6LPuINiDjmAPJO
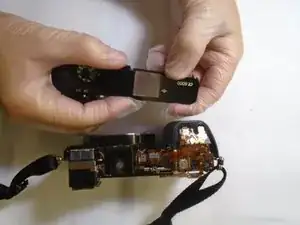
    • Positionnez la caméra avec le panneau supérieur orienté vers le haut.

    • Séparez soigneusement le haut de la caméra du corps à l'aide d'un outil d'ouverture en plastique.

    • Veillez à ne pas casser le haut de la caméra lorsque vous retirez le panneau supérieur.

  11. 1fXqWVIiwwNX634U
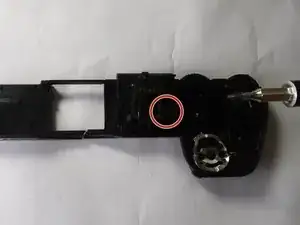
    • Positionnez la caméra de sorte que le dessous du panneau supérieur soit face à vous

    • À l'aide du tournevis Phillips n ° 00, dévissez la vis sous l'assemblage du flash.

  12. qNNhVtnRsQO5MT3v
    • Retirez soigneusement le flash du panneau supérieur

    Just pull the flash connector to remove the flash assemby. A toothpick can be helpful, especially to later reconnect the cable.

    Jürgen Walther -

Conclusion

Pour remonter votre appareil, suivez ces instructions dans l'ordre inverse.

William Lee

Membre depuis le 02/10/19

205 Réputation

5 commentaires

Anyone know where to get the flash? My daughter’s has the “won’t stay closed” problem so common to the a-series and I need to replace it.

David Reeves -

Thanks, good guide but please update it according to Jürgens comments or there is a big risk people will break their top panel.

David: I got the flash unit from AliExpress, but you can find it on Ebay as well.

Dan Lilliehorn -

Thanks for the guide! I had to open additional 2 more screws inside the battery compartment. and only had to remove 2 bottom screws on Step 8 (instead of 3). Replaced the flash unit without any issue. Thank you!

Dustin Nguyen -

Thank you for the Description, for me I had 2 screws below the view finder, and also 2 in the battery compartment that needed to come loose.

I did not have any screws behind the button to adjust for your eye sight.

I did have some issues to get the cable back in properly, and had to tape my metal tweezer not to get zapped over and over again.

What worked best for me was a flat tweezer and gently push it in.

When Placing back the top panel i had some issues with the alignment with the on off button as initially i couldn't turn the camera on/off any more. After trying some positions with the on off button it worked.

Erik -

I have the problem, that my camera doesn’t detect when I pop the flash out. Does anyone know a fix for that?

Bionz -