Introduction

Il s'agit d'un tutoriel prérequis ! Ce tutoriel fait partie d'une autre procédure et ne peut être consulté individuellement.


Ce tutoriel montre comment retirer et remplacer la vitre arrière de votre Pixel 3XL.

  1. wIigbvaXNQ1gCfa2
    wIigbvaXNQ1gCfa2
    4f3uBiUqnYIwtpHk
    5fCoAkkaQhAC1YlB
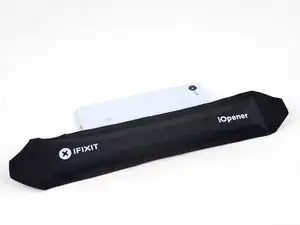
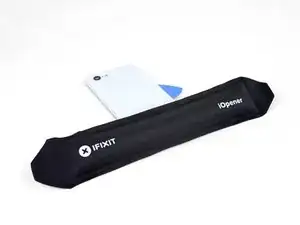
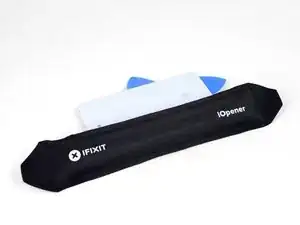
    • Faites chauffer un iOpener et posez-le sur le bord droit du panneau arrière pendant une minute.

    • Vous pouvez aussi utiliser un sèche-cheveux, un pistolet à air chaud ou une plaque chauffant, mais faites attention à ne pas surchauffer le téléphone. L'écran et la batterie interne sont tous deux sensibles à la chaleur.

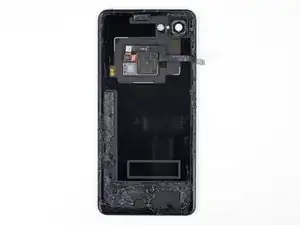
    • Pendant que vous attendez, repérez les zones suivantes de la coque arrière :

    • Il y a beaucoup d'adhésif tenace en bas du téléphone.

    • Faites attention à ne pas trancher la nappe du lecteur d'empreintes digitales en faisant levier.

  2. cZhYNQPJKIpeBdUV
    cZhYNQPJKIpeBdUV
    O3ZtiUsIEYd1LOi5
    PdMr62SQHqkykS2M
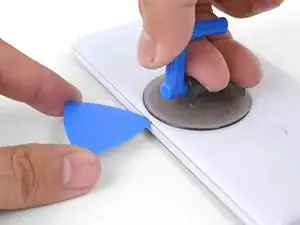
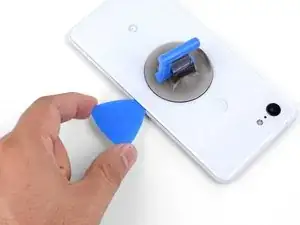
    • Appliquez une ventouse sur le bord chauffé de la coque arrière, aussi près que possible du bord.

    • Tirez fortement et constamment sur la ventouse pour ouvrir un espace.

    • Cette étape peut être difficile suivant l'âge du téléphone. Si vous avez du mal, refaites chauffer le bord et essayez de nouveau.

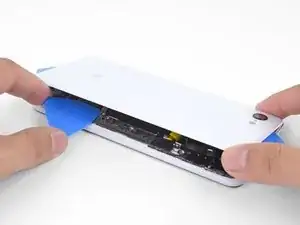
    • Insérez la pointe d'un médiator dans l'espace.

    Suction cup doesn’t work on severely cracked glass.

    Jeffrey Kongthong -

    Step 1 - 2 took me about 50 minutes. Back and forth with heat and trying with suction cup. I could get my finger nail in but not the pick. Took two people, but we finally got a pick in. 2 year old phone.

    Andrew Messier -

    Took about 15 minutes and three total attempts. On the third attempt, I also used a thinner, metal, pick to widen the gap just enough for the plastic pick to fit (Though be careful as you can easily break it with a metal pick). The phone is three years old.

    Hotohori -

    Could not get in with the pick or in from the side. Targeted the bottom of the phone with the iOpener and managed to gently create some space for the pick with the opener tool.

    Daniel R. -

    I also struggled here for a while. I ended up working my way around the entire edge of the phone until I found one spot where I could pry up the back panel. I used a jimmy instead of the opening pics. I also used a hairdryer on lower heat instead of the iopener. 3 year old phone.

    Bryan Wethington -

    Took 30 minutes + to get the back cover off. Used another suction cup to grip from the busted screen and the ifixit suction cup for the back. A thinner Acoustic guitar pick was required opposed to the standard Blues picks provided in the kit (har-har). Would HIGHLY suggest getting a pick into both the back and the front before removing the panels as it will give you more surfaces to pry from. Made that mistake...

    Brian Sommer -

    Over 2 hours of trying, I keep reheating the pouch and let it sit on the edge for sometimes up to 10 minutes since the directed 1 minute wasn't working. Physically cant get enough leverage on the back of the phone; picks are too thick to get under the crack, and the suction cup pops off before I can get enough force to see any gap open. Phone is 5 years old. I really need some help

    Grant Cooper -

    Hey Grant!
    I hear your pain—the adhesives on this phone are very strong. The initial gap is one of the hardest parts of the procedure. Here are some suggestions:
    * If you have a hair dryer, give that a shot. Heat the edge until it is slightly too hot to the touch.

    * These adhesives separate not with extreme force, but with constant steady force and time. Try heating the edge and pull on the suction cup with firm force for about a minute to let the adhesive separate.

    * If you have an opening tool, you can try this procedure to get the initial gap.

    Arthur Shi -

    Need a guide for if the back glass is broken!

    Lazybagel -

  3. ecDEBpnvfOTcMLZ2
    ecDEBpnvfOTcMLZ2
    2uOnUFqafrCYXyEN
    p51ClEsXXIXPIR4Z
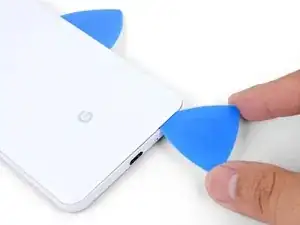
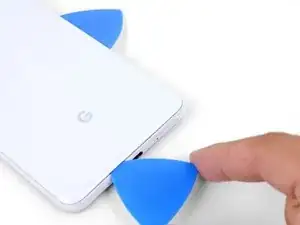
    • Faites glisser le médiator le long du bord droit pour y trancher l'adhésif.

    • L'adhésif durcit en refroidissant. Si cela vous arrive, refaites chauffer le bord pour faciliter la tranche.

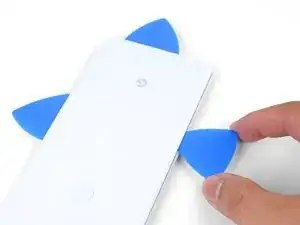
    • Une fois que vous avez tranché le bord, laissez un médiator dans la jointure pour empêcher que l'adhésif colle à nouveau.

  4. KQZNiMIXEoEv3sQA
    • Appliquez un iOpener chaud en bas de la vitre arrière pendant une minute.

  5. gBLNTMRXodCAlNJR
    gBLNTMRXodCAlNJR
    Vbq4vFubRlSHJKRY
    4UK5LbKHwIXueBJp
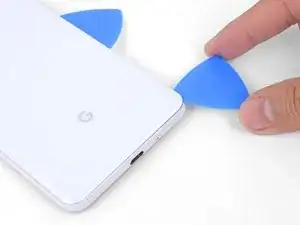
    • Servez-vous d'un médiator pour trancher l'adhésif le long du coin inférieur droit, puis le long du bord inférieur du téléphone.

    • Progressez lentement autour du coin pour éviter de fissurer le panneau. Si vous commencez à avoir du mal, refaites chauffer.

    • Laissez un médiator dans le coin pour empêcher l'adhésif de recoller.

  6. K1DNALhsFYem6WuY
    K1DNALhsFYem6WuY
    2FCl2jg2ZVTGSvUm
    IXQXmHMoJGXm3PXr
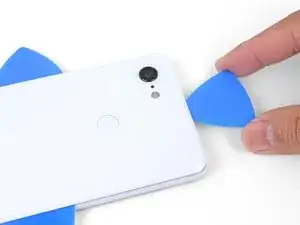
    • Continuez à faire chauffer et à trancher les bords restants.

    • Faites attention en tranchant le long du bord gauche du téléphone. Si vous avez l'impression que le médiator reste coincé en haut, il se peut que vous ayez heurté le lecteur d'empreintes digitales. Rapprochez légèrement le médiator de la jointure et recommencez.

    • Assurez-vous de trancher à travers les portions d'adhésif plus épaisses en bas et à droite du téléphone.

    The back cover is Glass!!!!. DO NOT PRY HARD, IT WILL BREAK!!!!!!!

    You must go slowly and let the heat do the work, if you force the cover off, it will shatter.

    Paul Bernstein -

  7. USkM2UJmmdDVnTmv
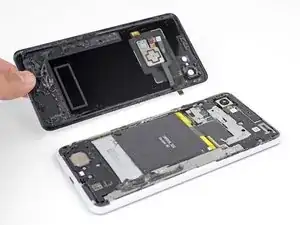
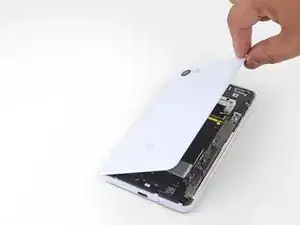
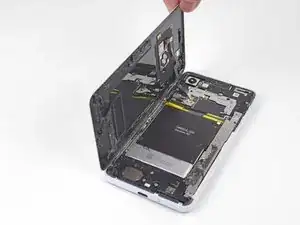
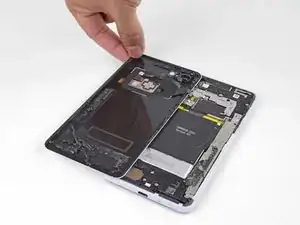
    • Soulevez délicatement le bord droit de la coque arrière.

    • Servez-vous d'un médiator pour trancher tout reste d'adhésif sur le long des bords.

  8. 1nxmI4hs2Gymfag5
    1nxmI4hs2Gymfag5
    M4kcSI5plQnJtuT1
    MBJ2GPSSE3RnNtLF
    • Soulevez le bord droit de la coque arrière, retournez-le et posez-le à gauche du téléphone.

    • Veillez à laisser du mou à la nappe du lecteur d'empreintes digitales et à ne pas la coincer.

    • Quand vous effectuez le remontage, c'est le moment d'allumer votre téléphone et de tester s'il fonctionne avant de le refermer. Veillez à le rééteindre complètement avant de continuer votre travail.

    • Lors du remontage, consultez ce tutoriel pour poser les bandes adhésives coupées sur mesure de votre coque arrière.

    Reassembly is way harder. The adhesive guide is generic and not super helpful, so don't be surprised if things went smoothly until you get to this step and then everything starts sticking to things its not supposed to.

    Christopher Trimby -

    This is great but how you address that fact that the phone is tied to a particular fingerprint sensor and after replacing, the new sensor is not recognized by the original phone?

    Dave -

    Hi Dave!

    There's a software calibration tool that you can use to calibrate your new fingerprint sensor. I've updated this step to include a link to the tool.

    Arthur Shi -

    I have a pixel 3 xl and I can't get the tool to work. I finally got the driver's installed after several hours and it says it's for pixel 6 and up basically. So I tried the other option and it's basically saying to do a factory reset? Did I mess something up on the install or what am I doing wrong here? Thanks

    Cody L Paulsell -

    Uhhh

    So, apparently the connector on the motherboard for the fingerprint sensor is just ridiculously fragile, because after plugging and screwing everything in (pretty much reassembled except for the adhesive), I closed up the phone and powered it on to test if everything was working, and when I opened it back up and let the top hang off to the side, it just snapped off. I didn't even have it tensioned that much, it was just hanging off to the side and snapped. So now I've traded a non-functional camera with a non-functional and irreparable (unless I get a new motherboard) fingerprint sensor.

    The guide really ought to emphasize how delicate that connector really is. I have a google drive link here to a photo of the remnants of my poor fingerprint sensor connector :( link

    Mindle -

    Wasted a ton of time and effort (and money) trying to use this guide to repair my Pixel 3XL. Then I get to the software calibration tool and find:

    Unsupported device

    This is not a compatible device. Only Pixel 6, 6 Pro, 6a, 7, 7 Pro, 7a devices can install this software.

    I cannot say how frustrating it is when a guide and website that tried to be so helpful ends up like this. Failure due to referencing tools not on the site and not suitable for the job.

    Ross Chesley -

    I too want to stress just how sensitive the fingerprint sensor cable is. Be sure you are only lifting the back away a very small amount until you are able to disconnect the cable. I thought I was being careful and ended up still putting a small tear in the cable!

    The good news is that a replacement sensor is well under $10 shipped. Also, I'm not sure why this guide recommends the use of the software tool.

    It is not compatible with the 3XL (and I'm not sure it ever was). I had some reservations when I read this when I had to replace my sensor, but I found comments else where stating that nothing was needed. Sure enough, when I got my new sensor installed, it worked with no issues. I didn't need to calibrate, or reset my device. I just needed to set my fingerprints up again.

    Ben H -

  9. 66BxIa114CvPBDXF
    • Prenez une pincette pour décoller et enlevez soigneusement le morceau de ruban adhésif jaune qui recouvre le connecteur du lecteur d'empreintes digitales.

    This step is utterly unnecessary. It achieves nothing, and the tape is there for a reason (I'm not sure why, maybe to prevent short circuits). I didn't remove this tape while disassembling and it didn't change anything.

    Krzeszny -

    The Kapton tape should adhere to both the cable and the connector. It helps prevent the cable from slipping out of the ZIF connector. You're right in that you don't have to completely remove the tape—I've adjusted the step to reflect this.

    Arthur Shi -

    I just finished this guide, thank you. It would be nice to have a "before ribbon removed" reference picture that's also without the Kapton tape in place if possible. I was no longer certain how far back into the ZIF connector I had to place the ribbon cable as I simply forgot what it looked like before removing it. Basically, it "felt" like it was out too far, but since I had no reference I couldn't compare. Step 10 has good close up pics, but the ribbon cable is already out a bit so a bad reference.

    teknomedic -

  10. sIaa2bIVcTWtgVNZ
    sIaa2bIVcTWtgVNZ
    kljONWUpcx2eLE4p
    syrHkK1ndwxqPAh2
    • Prenez la pointe d'une spatule (spudger) pour retourner délicatement le clapet noir de la prise ZIF du lecteur d'empreintes digitales.

    • Saisissez la languette de la nappe avec votre pincette ou vos doigts et sortez délicatement la nappe de sa prise.

    • Pour éviter les courts-circuits, veillez à ne pas toucher les contacts en métal de la nappe avec votre pincette.

  11. KOLMNRDZQHXDXx2H
    • Retirez la coque arrière.

Conclusion

Pour remonter votre appareil, suivez ces instructions en sens inverse.

Arthur Shi

Membre depuis le 03/01/18

271465 Réputation

0 commentaires