
Introduction
-
-
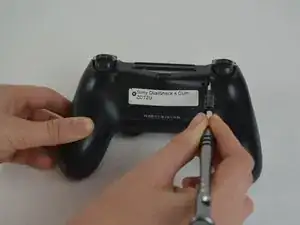
Dévissez les quatre vis de 6,5 mm à l'aide d'un tournevis cruciforme.
-
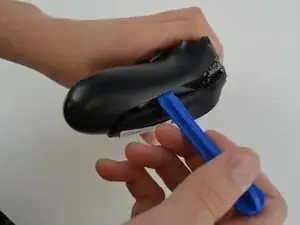
Écartez les deux moitiés de la coque à l'aide d'un outil d'ouverture en plastique.
-
-
-
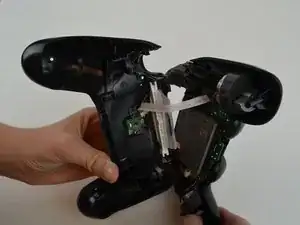
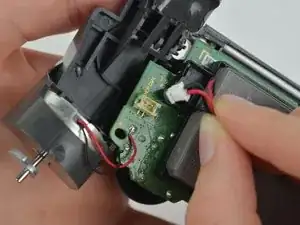
Débranchez les fils noir et rouge du port d'alimentation situé sur la carte mère.
-
Retirez l'ancienne batterie du contrôleur.
-
-
-
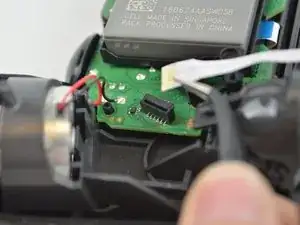
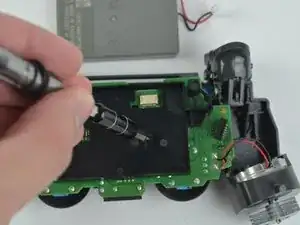
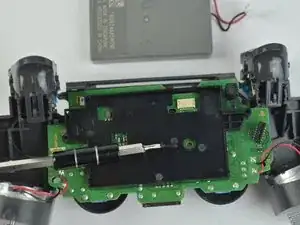
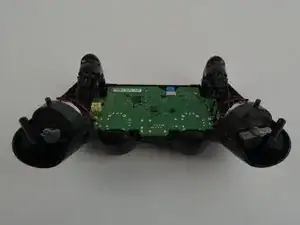
Retirez la vis de 6,43 mm reliant la carte mère au fonctionnement interne du contrôleur, à l'aide d'un tournevis cruciforme.
-


Conclusion
Pour remonter votre appareil, suivez ces instructions dans l'ordre inverse.

When re-asembling, be careful to check that all buttons/triggers are moving correctly. They can get misaligned when prying the two shell halves apart.
Tale Spinner -
This part is missing vital information on how to correctly pry the case open. In the 3rd picture you can see there is actually damaged/broken clip already. In order to open the case without damage to the plastic clips inside the controller holding the plastics together you need to insert thin piece of metal between the trigger buttons on each side and push the clip outwards before trying to separate the parts, and if done correctly there is no force needed to pry open the controller. There is actually no necessary need for the clips, but if you want to keep your controller in mint condition without voiding the warranty, take care not to break these clips.
Ville Närhi -
Your advice for opening shell was so bad and harmful.
It's not correct
Kiarash Moallemi -
And two more tiny clips to the left and right of the headphone & EXT port. They’re VERY delicate, reckless prying WILL break at least ONE of these.
Strings Cat -
I've written a guide for how to find and unlatch the clips
Étape importante pour l'ouverture de la DualShock 4 CUH-ZCT2U
Richard -