
Introduction
La caméra principale de votre iPhone 7 ne prend plus de superbes photos ? Suivez les étapes de ce tutoriel pour remplacer la caméra arrière iSight dans un iPhone 7.
Outils
-
-
Éteignez votre iPhone avant de commencer le démontage.
-
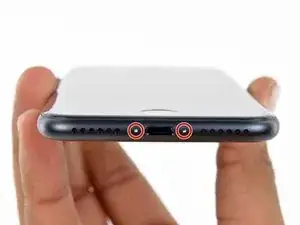
Retirez les deux vis Pentalobe de 3,4 mm qui se situent sur le bord inférieur de l'iPhone.
-
-
-
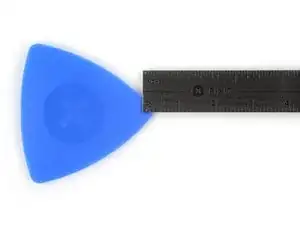
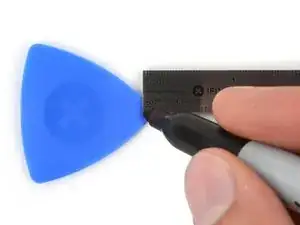
Mesurez 3 mm à partir de la pointe et tracez une ligne sur le médiator avec un marqueur permanent.
-
-
-
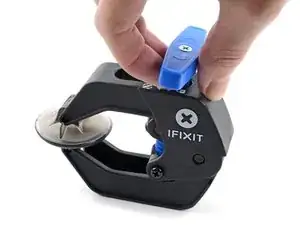
Les trois étapes suivantes sont consacrées à la procédure avec l'Anti-Clamp, un outil facilitant les procédures d'ouverture. Si vous n'avez pas d'Anti-Clamp, passez à la procédure alternative deux étapes plus loin.
-
Tirez la poignée bleue vers l'arrière pour débloquer les bras de l'Anti-Clamp.
-
Insérez le bord gauche ou droit de votre iPhone entre les bras de l'Anti-Clamp.
-
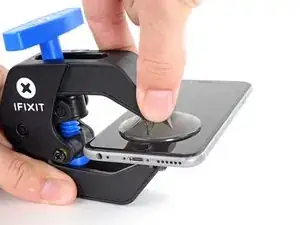
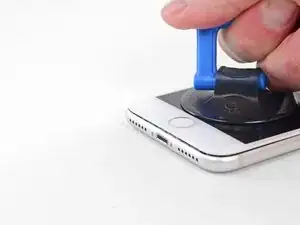
Placez les ventouses près du bord inférieur de l'iPhone, juste au-dessus du bouton home - une à l'avant et une à l'arrière.
-
Pressez les ventouses l'une contre l'autre pour appliquer la succion sur la zone souhaitée.
-
-
-
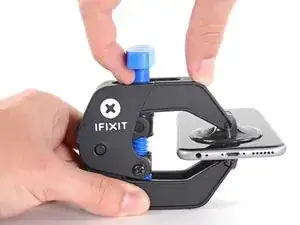
Tirez la poignée bleue vers l'avant pour bloquer les bras.
-
Tournez la poignée dans le sens horaire de 360 degrés ou jusqu'à voir les ventouses commencer à s'étirer.
-
Veillez à ce que les ventouses restent alignées. Si elles commencent à bouger, desserrez légèrement les ventouses et réalignez les bras.
-
-
-
Chauffez un iOpener et passez-le dans les bras de l'Anti-Clamp.
-
Pliez l'iOpener de manière à ce qu'il repose sur le bord inférieur de l'iPhone.
-
Attendez au moins une minute pour permettre à l'adhésif de se décoller et d'ouvrir un interstice.
-
Insérez un médiator dans l'interstice.
-
Passez les trois prochaines étapes.
-
-
-
Chauffer la partie inférieure de l'iPhone aide à ramollir la colle qui fixe l'écran. Il sera alors plus facile d'ouvrir celui-ci.
-
Utilisez un sèche-cheveux ou préparez un iOpener. Posez celui-ci sur la partie inférieure de l'iPhone pendant environ 90 secondes afin de ramollir la couche d'adhésif en dessous.
-
-
-
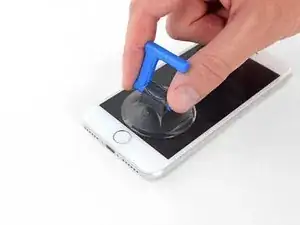
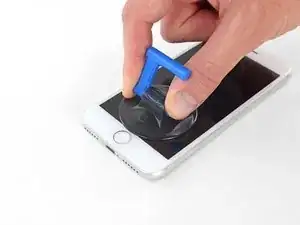
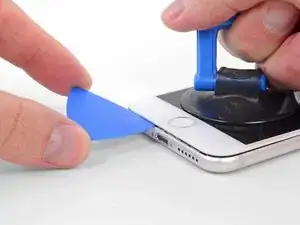
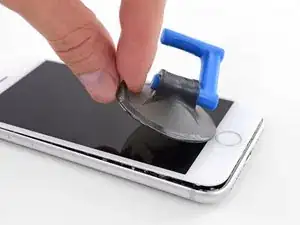
Tirez sur la ventouse de façon ferme et constante pour créer un petit interstice entre l'écran et le châssis.
-
Insérez un médiator dans cet interstice.
-
-
-
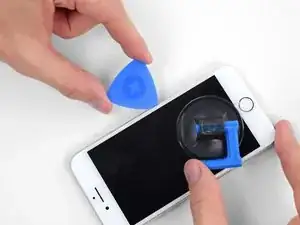
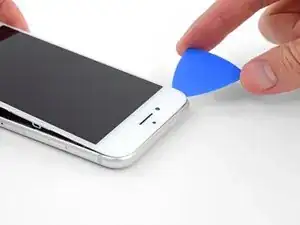
Faites glisser votre médiator le long du côté gauche en commençant par le bord gauche puis en progressant vers les boutons de contrôle du volume et le bouton du silencieux, pour faire céder l'adhésif qui maintient l'écran.
-
Arrêtez-vous juste avant le coin supérieur gauche de l'écran.
-
-
-
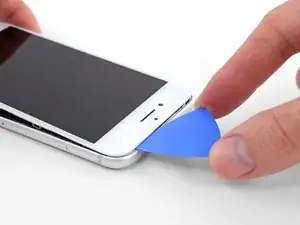
Réinsérez votre outil dans le coin inférieur droit de l'iPhone, faites-le glisser le long du coin, puis progressez vers le haut, le long du bord droit du téléphone, pour faire céder l'adhésif.
-
-
-
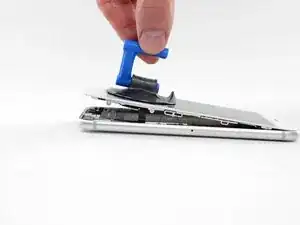
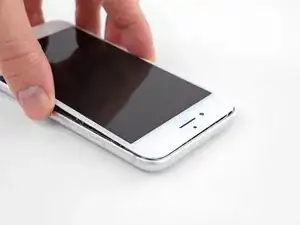
Tirez délicatement sur la ventouse pour soulever le bord inférieur de l'écran.
-
Tirez sur la petite bosse de la ventouse afin de la décoller du panneau frontal.
-
-
-
Faites glisser un médiator sous l'écran, le long du bord supérieur gauche et du bord supérieur du téléphone, pour faire céder le reste de l'adhésif.
-
-
-
Faites glisser légèrement l'ensemble écran vers le bas (éloignez-le du bord supérieur du téléphone) pour ouvrir les clips le maintenant à la coque arrière.
-
-
-
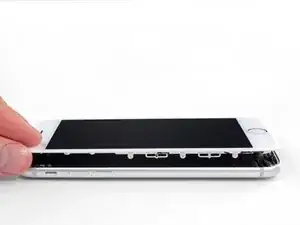
Ouvrez l'iPhone en faisant pivoter l'écran vers le haut en partant du côté gauche, comme s'il s'agissait de la couverture d'un livre.
-
Calez l'écran contre un objet afin qu'il reste bien stable pendant que vous travaillez sur les composants du téléphone.
-
-
-
Enlevez du support du connecteur inférieur les quatre vis tri-point Y000 de longueurs suivantes :
-
Trois vis de 1,2 mm
-
Une vis de 2,4 mm
-
-
-
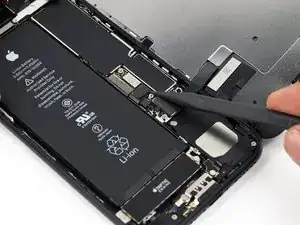
Utilisez la pointe d'une spatule (spudger) pour détacher le connecteur de la batterie de sa prise sur la carte mère.
-
-
-
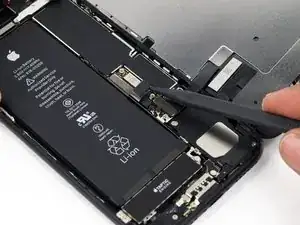
Assurez-vous que la batterie est débranchée avant de déconnecter ou reconnecter les nappes de cette étape.
-
Utilisez l'extrémité plate d'un spudger ou un ongle pour débrancher les deux connecteurs inférieurs de l'écran en les tirant tout droit hors de leur prise sur la carte mère.
-
-
-
Retirez les deux vis cruciformes #000 de 1,3 mm fixant le support sur le connecteur de l'ensemble capteur du panneau avant.
-
-
-
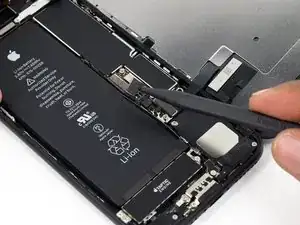
Débranchez le connecteur de l'ensemble capteur du panneau avant, de sa prise sur la carte mère.
-
-
-
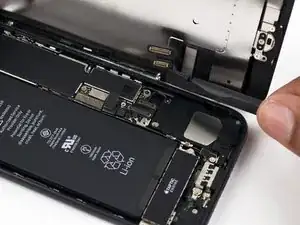
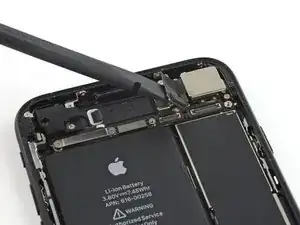
Utilisez l'extrémité plate d'un spudger pour débrancher le connecteur de la caméra arrière de sa prise sur la carte mère.
-
-
-
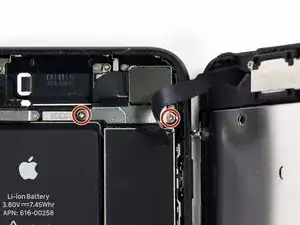
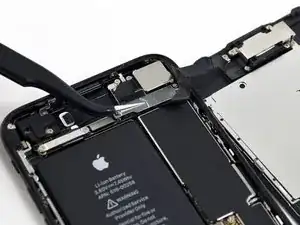
Retirez les vis cruciformes suivantes fixant le support de la caméra arrière sur le module de caméra :
-
Une vis de 1,3 mm
-
Une vis de 2,5 mm
-


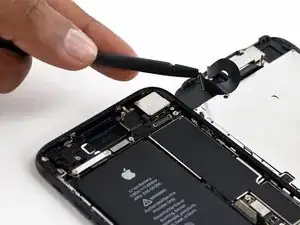


Pour réassembler votre appareil, suivez ces instructions dans l'ordre inverse.

10 commentaires
Anybody knows how to replace the lens of the rear camera? Thanks in advance
Bit late but i fund this video for anyone still wondering how to just replace the glass (its pretty straightforward but can go wrong) https://www.youtube.com/watch?v=TeDktasa...
I wanted to ask if anyone can please assist me. Does the iPhone 7 rear camera fit the iPhone 8 camera because they are the same design and megapixel??
Tim -
Can anyone confirm 7/7P's pentalobe screws have a ring of seal near the screw head?
Cooper Chase -
Confirmed, the screws have a black ring seal around the head.
rcheing -
Can’t get the display front
Bernadette Pfeifer -
From personal experience, I highly recommend before doing this procedure or any other, that you do a backup of your phone (preferably local) in case your procedure goes south.
ballina5ny -
I purchased the repair tools with the replacement battery from iFixit. The tools include a screw driver and three heads none were labeled 3.4 mm. I think the one that fit the pentalobe screws was labeled Y000. The guide should identify the screw driver head supplied by the kit not 3.4mm.
Mark Lieberman -
in the iphone 7 replacement battery kit from iFixit, the screwdriver that fits the 3.4 mm pentalobe screws is labeled P2 (and not Y000)
Jan-Tijn Oppermann -
3.4 mm is the height of the screw and is not related to the screw driver code.
Ahmad Vaziri -
the screwdriver PH000 does not work i wasted two screws and now they dont have the 4 cross mark they are now a circle, i buyed it all from Paraguay and it doesnt work, had to assembly back the parts because i got stuck like i mention with some screws, well im just going to send to a professional to install, thanks
Martin Frutos, Nuñez -
The bottom screws are Pentalobe, not Phillips.
Bram Driesen -
Before starting, I would recommend backing up your Iphone’s data just in case.
Jon Moylan -
If you managed to make it to this section, just send the phone into apple for 50 + 6 dollars shipping. The ribbon cables on the screen are designed to break. I can literally twist on the rest of the cable and it won’t fall apart but there is a diagonal section where it snaps. This is the fault of apple and the fault of ifixit for misrepresenting the fragility of the cables.
Ryan Huebert -
Had to reheat it a few times for a minute each with a hairdryer to get the seal to break after pulling and rocking the suction
Cynthia Lamb -
I’m technically challenged. Is there a premier national service who can professionally install a replacement battery got my 7 +?
Richard -
Do the screws come out in total?
YVES THEUGELS -
They may come out or may not. If you loosen as much as you can and they don't come out you should still be able to pry open the bottom. Once you get the screen off you can then push the screws out from the inside.
Anthony Falabella -
Is it the P2 you should use for the bottom??
YVES THEUGELS -
I heated the bottom of the phone with a hairdryer and then used a syringe to put a couple of drops of acetone directly into the bottom two screw holes. I GENTLY pulled on the screen with the suction cup and used the pry tool to GENTLY separate the screen. The sealant is applied around the entire display so be very careful pulling it off so you don’t break the fragile display cables.
Anthony Scaminaci -
At first it was very difficult to open, per instructions. I used a heat/ice pack and nuked it for 1 minute. The pry tool wasn’t working so I carefully used my pocket knife to wedge the cover open. The rest of the procedure went well until I cracked the glass while trying to get the top right corner to pop off. Other than that mistake, all went well. Tip: before setting the new battery, attach the battery connector first and leave enough room for the taptic engine, or better yet, place the taptic engine before adhering the replacement battery. This way you’ll have a small gap between the two, whereas mine barely fit. Good job on hosting the video, Gwendyl.
Klaus Preiss -
I love the fact that the screw bit and shaft are magnetic! I almost lost a screw and found it attached to the magnet.
I used a heat/ice pack and nuked it for 1 minute. At first the display cover was very difficult to open with the pry tool, per instructions. The pry tool wasn’t working so I carefully used the blade of my pocket knife to wedge the cover open. The rest of the procedure went well until I cracked the glass while trying to get the top right corner to pop off. Other than that mistake, all went well. Tip: before setting the new battery, attach the battery connector first and leave enough room for the taptic engine, or better yet, see the taptic engine in place before adhering the replacement battery. This way you’ll have a small gap between the two, whereas mine barely fit because I placed it almost too low.
Good job on hosting the video, Gwendyl.
Klaus Preiss -
I replaced the lightning connector assembly and reassembled. The old one did not 'click' into the cable and had corrosion inside, it needed the cable to be placed in a specific way to charge. The new part - does not recognize that a charger is plugged in at all.
I backtracked the assembly - took it apart, put it back again - and find that every thing on the part works - the mic, speakers, taptic engine.
The original problem with the cable still persists. Any ideas?
H K -