Introduction
Ce tutoriel de réparation provient de l'équipe iFixit et n'a pas été soumis à l'approbation de Google. Pour en savoir plus sur nos tutoriels de réparation, c'est par ici.
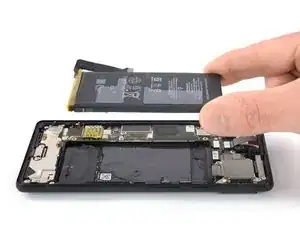
Suivez ce tutoriel pour changer la batterie usée ou morte dans votre Google Pixel 6.
Si votre batterie est gonflée, prenez les précautions appropriées.
Pour votre sécurité, déchargez votre batterie en dessous de 25 % avant de démonter votre téléphone. Cela réduit le risque d'incendie si la batterie est accidentellement endommagée pendant la réparation.
Attention : le Pixel 6 Pro contient des lasers de classe 1. Le démontage peut exposer à des émissions laser infrarouges invisibles.
L'étanchéité après la réparation dépendra de la qualité du remplacement des joints adhésifs, mais votre appareil perdra son indice de protection IP (Ingress Protection) qui évalue l'étanchéité.
Il vous faudra de nouvelles bandes adhésives pour fixer des composants lors du remontage de l'appareil.
Outils
-
-
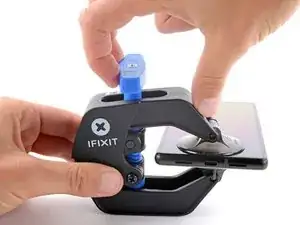
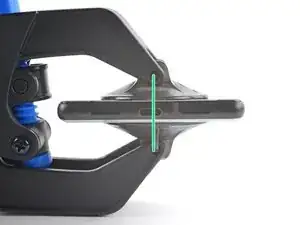
Tirez la poignée bleue vers l'arrière pour déverrouiller les bras de l'Anti-Clamp.
-
Positionnez les ventouses en bas du téléphone : une devant, une derrière.
-
Appuyez sur les ventouses pour faire le vide.
-
-
-
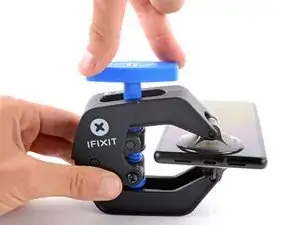
Tirez la poignée bleue vers l'avant pour bloquer les bras.
-
Tournez la poignée dans le sens des aiguilles d'une montre, d'un tour ou jusqu'à ce que les ventouses commencent à s'étirer.
-
Faites en sorte que les ventouses restent alignées entre elles. Si elles commencent à glisser, détacher les ventouses légèrement et réalignez les bras.
-
-
-
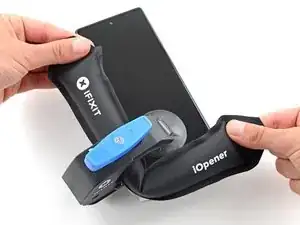
Faites chauffer un iOpener et passez-le entre les bras de l'Anti-Clamp.
-
Vous pouvez aussi utiliser un sèche-cheveux ou un pistolet à air chaud, mais une chaleur extrême peut endommager l'écran et/ou la batterie interne, donc soyez prudents.
-
Attendez une minute pour laisser le temps à l'adhésif de se relâcher et de s'écarter.
-
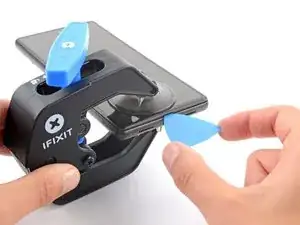
Insérez un médiator sous le châssis de l'écran lorsque l'Anti-Clamp a créé un espace suffisant.
-
Sautez les deux étapes suivantes.
-
-
-
Chauffez un iOpener et posez-le sur l'écran pendant au moins trois minutes pour ramollir l'adhésif en dessous.
-
-
-
Quand l'écran est chaud au toucher, positionnez une ventouse sur le bord inférieur de l'écran.
-
Soulevez l'écran avec son châssis de sécurité à l'aide de la ventouse, pour créer un petit interstice entre l'écran et le reste du téléphone.
-
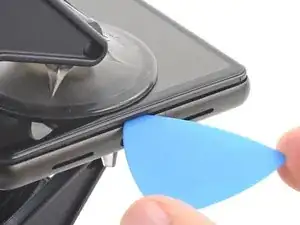
Insérez un médiator dans l'interstice entre l'écran et le reste du téléphone.
-
Faites glisser le médiator vers le coin inférieur droit de l'écran pour découper l'adhésif.
-
Laissez le médiator en place pour éviter que l'adhésif adhère de nouveau.
-
-
-
Insérez un deuxième médiator dans le bord inférieur et faites-le glisser vers le coin inférieur gauche de l'écran, pour couper l'adhésif.
-
Laissez le médiator en place pour éviter que l'adhésif adhère de nouveau.
-
-
-
L'écran du Google Pixel 6 est fixé non seulement par de l'adhésif mais aussi par des petits clips en plastique. Si votre médiator bloque lors de la procédure de retrait, vous l'avez inséré trop profondément sous l'écran. N'insérez que la pointe du médiator (3-4 mm) lorsque vous découpez l'adhésif de l'écran.
-
Insérez un troisième médiator sous le coin inférieur gauche de l'écran.
-
Faites glisser le médiator le long du côté gauche de l'écran pour découper l'adhésif.
-
Laissez le médiator dans le coin supérieur gauche pour éviter que l'adhésif adhère de nouveau.
-
-
-
Insérez un quatrième médiator sous le coin supérieur gauche de l'écran.
-
Faites glisser le médiator le long du bord supérieur de l'écran pour découper l'adhésif.
-
Laissez le médiator dans le coin supérieur droit pour éviter que l'adhésif adhère de nouveau.
-
-
-
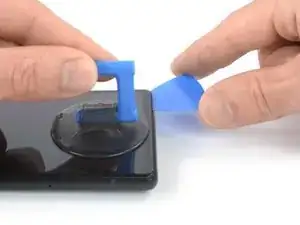
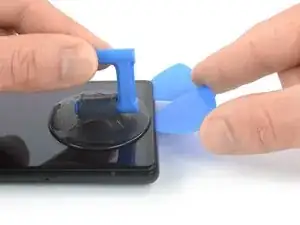
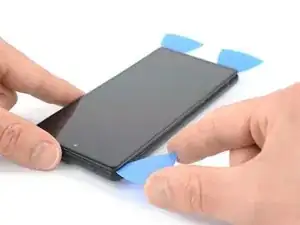
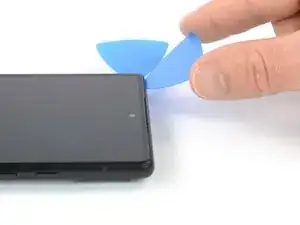
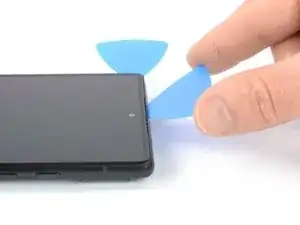
Insérez un cinquième médiator et faites-le glisser le long du bord droit du téléphone pour découper l'adhésif restant.
-
-
-
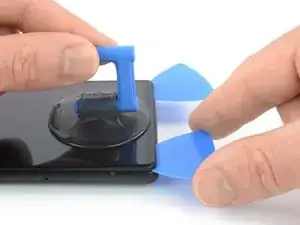
Faites soigneusement pivoter le côté droit de l'écran vers le côté gauche du reste du téléphone, comme si vous ouvriez un livre.
-
-
-
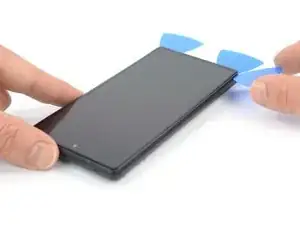
À l'aide d'une spatule, déconnectez la nappe d'écran en faisant levier sur son connecteur pour le soulever tout droit hors de sa prise.
-
-
-
Ôtez l'écran.
-
Contrôlez l'encoche de de la caméra frontale sur l'écran de remplacement et retirez-y tout élément de protection restant.
-
Pensez à réinstaller le cache de la nappe d'écran.
-
C'est le bon moment pour tester votre téléphone avant de le sceller. Connectez temporairement votre écran, allumez votre téléphone et assurez-vous qu'il fonctionne comme prévu. Avant de poursuivre le remontage, éteignez votre téléphone et débranchez l'écran.
-
Suivez ce tutoriel lors du remontage, si vous utilisez des bandes adhésives découpées sur mesure.
-
Suivez ce tutoriel lors du remontage, si vous utilisez une carte adhésive prédécoupée.
-
Si vous installez un nouvel écran, suivez ce tutoriel pour calibrer le lecteur d'empreintes digitales.
-
-
-
Appliquez un iOpener chauffé ou utilisez un pistolet à air chaud pour chauffer la vitre arrière pendant au moins deux minutes, afin de ramollir l'adhésif sous la feuille de graphite qui se trouve sur la batterie.
-
-
-
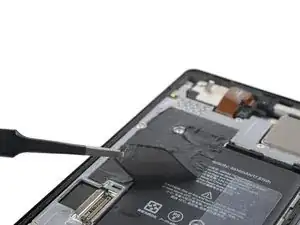
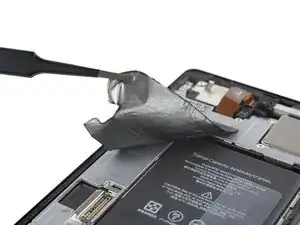
Utilisez une pincette arrondie ou un ongle propre pour décoller soigneusement la feuille de graphite noire du bord supérieur de la batterie et de la plaque de protection de la carte mère.
-
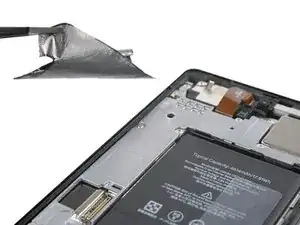
Ôtez la feuille de graphite.
-
-
-
Utilisez une pincette arrondie ou un ongle propre pour décoller soigneusement la feuille de graphite noire du bord gauche de la batterie et de la plaque de protection de la carte mère.
-
-
-
Utilisez une pincette arrondie ou un ongle propre pour décoller soigneusement la feuille de graphite noire du bord inférieur de la batterie et de l'ensemble du haut-parleur.
-
Ôtez la feuille de graphite.
-
-
-
Utilisez un tournevis Torx T3 pour retirer les vis qui fixent le cache de la carte mère :
-
Huit vis de 4,8 mm de long
-
Une vis de 2,4 mm de long
-
-
-
Utilisez un tournevis Torx T3 pour retirer les cinq vis de 5,1 mm de long qui fixent le cache de la carte mère.
-
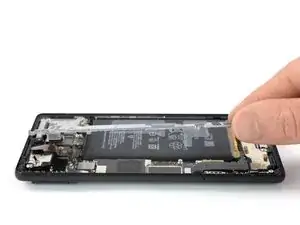
Soulevez soigneusement le cache de la carte mère et ôtez-le.
-
-
-
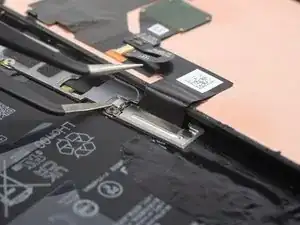
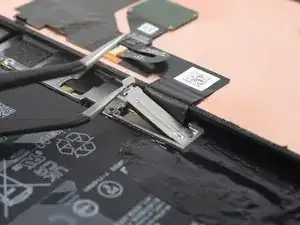
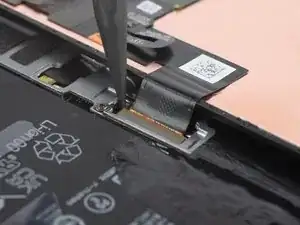
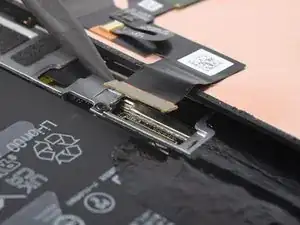
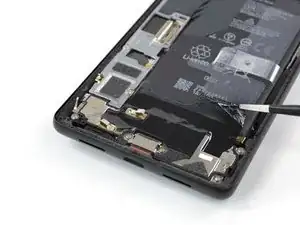
Utilisez une spatule pour déconnecter la nappe de la batterie en soulevant son connecteur tout droit hors de sa prise.
-
-
-
Inclinez votre téléphone à un angle d'environ 45°.
-
Appliquez quelques gouttes d'alcool isoropylique à haute concentration (> 90°) dans l'interstice entre la carte mère et les coins supérieur gauche et inférieur gauche de la batterie.
-
-
-
Insérez un médiator dans l'interstice entre le bord supérieur de la batterie et la carte mère.
-
Utilisez votre médiator pour faire levier sur la batterie en inclinant votre médiator vers le bas et élargir l'interstice entre la batterie et la carte mère, suffisamment pour pouvoir y insérer une carte en plastique.
-
-
-
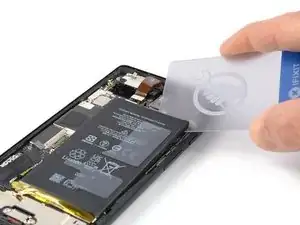
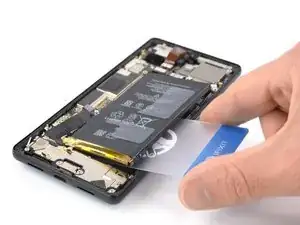
Insérez une carte en plastique sous le coin supérieur droit de la batterie.
-
Faites glisser la carte en plastique sous le bord supérieur de la batterie pour découper l'adhésif et pour faire levier.
-
-
-
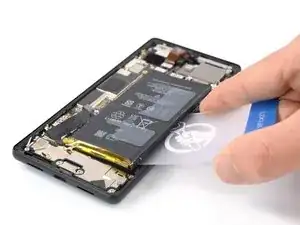
Faites glisser la carte en plastique le long du bord droit vers le bord inférieur de la batterie pour la séparer du châssis central et découper l'adhésif.
-
Utilisez votre carte en plastique pour faire levier sur la batterie afin de la soulever.
-


Si possible, allumez votre appareil et testez votre réparation avant de mettre du nouvel adhésif et de fermer l'appareil.
Comparez votre nouvelle pièce de rechange à la pièce d'origine - il se peut que vous deviez transférer les composants restants ou retirer les dos adhésifs de la nouvelle pièce avant de l'installer.
Pour remonter votre appareil, suivez les étapes ci-dessus dans l'ordre inverse. Lors du remontage, nettoyez les zones d'adhérence avec de l'alcool isopropylique (> 90 %) et posez une nouvelle couche d'adhésif là où c'est nécessaire.
Pour des performances optimales, calibrez votre batterie fraîchement installée après avoir terminé ce tutoriel.
Pour exécuter un test de diagnostic avec l'outil de diagnostic Pixel intégré, cliquez ici.
Déposez vos déchets électroniques dans un centre de recyclage certifié.
La réparation ne s'est pas déroulée comme prévu ? Essayez des solutions de dépannage de base ou demandez de l'aide sur notre Forum.

15 commentaires
Something this guide should add is when using the card to pop the battery adhesive, keep as much to the edge in the middle as you can. The qi charger is covered in that graphite like tape and that is easily damaged. You can see that a little bit in the pictures where it was damaged.
If you have the kit, pay attention to the adhesives. The battery already has adhesive attached, the clear plastic pieces are the battery spacers (look at old battery for positioning), and the graphite tapes match the old. Be careful that the plastics already on the battery (the little tab handle thing), the spacers, and the graphite tape don't overlap.
My original battery started to expand and even lifted up the screen! I had to replace the battery urgently.
I used the genuine Google replacement parts sold through iFixit. Everything worked as expected. I can only recommend using the Pixel Phone Series due to its good repairability and the availability of replacement parts and guides through iFixit. (Availability of Custom ROMs such as GrapheneOS and others is another great bonus :) )
All in all: Magnificent guide for a great device. Thank you guys!
Great guide - than you for your effort Dominik.
My battery had swollen so it was already popping off the screen for me so getting the screen off wasn't so hard :) For me the trickiest bit was getting the battery out - the adhesive was really hard to unstick. Had to do a three or four attempts with the alcohol - take your time and it will come out, don't force it.
Good luck!
Oli -
If I cannot use my screen, how do I power it off?
Craig Joseph Van Vliet -
I was thinking the same. Could let the battery run down.
Jack Adrian Zappa -
You can turn the Smartphone off via the boot menue. Push the on/off-button plus the volume up button at the same time. Once the smartphones goes off to restart, hold the volume down button. The smartphone will boot and you can select between recovery mode and other options. You will find the option turn off, which you can select then with the buttons on the side.
Jonas R. -